Skip to content

Welcome to LightlyStudio!

LightlyStudio is an open-source tool designed to unify your data workflows from curation, annotation and management. Built with Rust for speed and efficiency, it lets you work seamlessly with datasets like COCO and ImageNet, even on a MacBook Pro with an M1 chip and 16 GB of memory.

Image title 
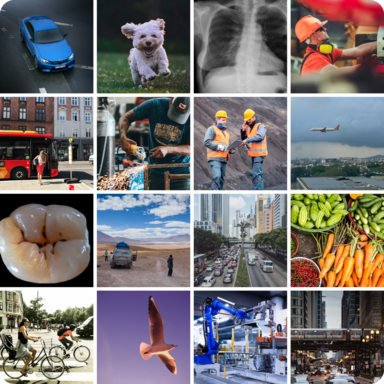
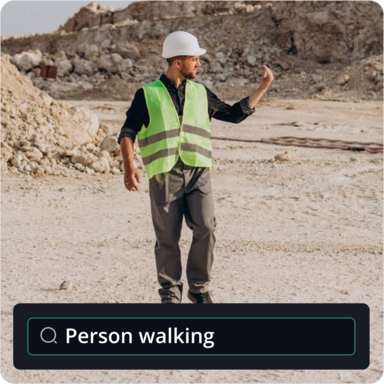
Discover insights instantly with AI-powered search and smart filters.

Image title 
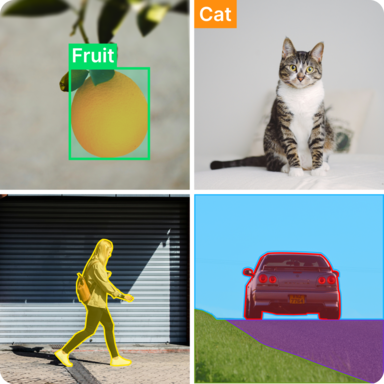
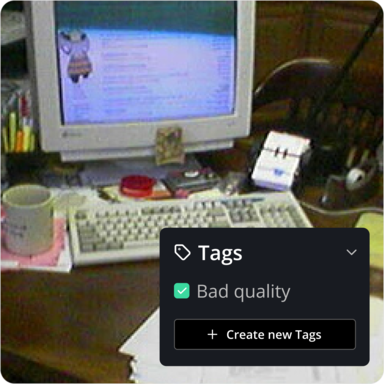
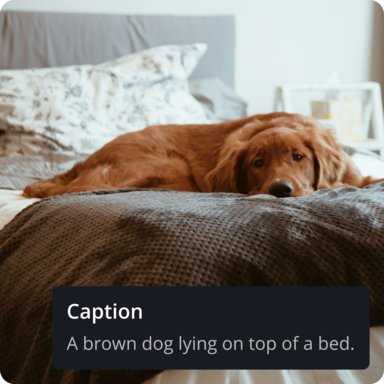
Create, edit, or remove annotations directly within your dataset.

Image title 
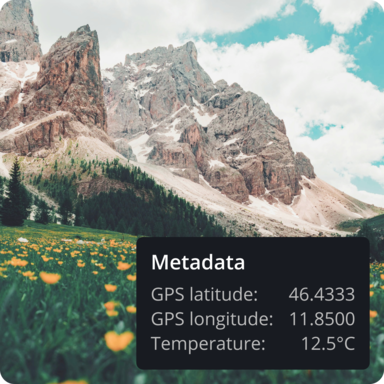
Visualize your dataset’s structure in the embedding space projected with PaCMAP.

Image title Export selected samples and annotations in your preferred format.

Installation

Ensure you have Python 3.8 or higher. We strongly recommend using a virtual environment.

The library is OS-independent and works on Windows, Linux, and macOS.

# 1. Create and activate a virtual environment (Recommended)
python3 -m venv venv
source venv/bin/activate

# 2. Install LightlyStudio
pip install lightly_studio
# 1. Create and activate a virtual environment (Recommended)
python -m venv venv
.\venv\Scripts\activate

# 2. Install LightlyStudio
pip install lightly_studio

Quickstart

The examples below download the required example data the first time you run them. You can also directly use your own image, video, or YOLO/COCO dataset.

To run an example using an image-only dataset, create a file named example_image.py with the following contents:

example_image.py
import lightly_studio as ls
from lightly_studio.utils import download_example_dataset

# Download the example dataset (will be skipped if it already exists)
dataset_path = download_example_dataset(download_dir="dataset_examples")

# Indexes the dataset, creates embeddings and stores everything in the database. Here we only load images.
dataset = ls.Dataset.create()
dataset.add_images_from_path(path=f"{dataset_path}/coco_subset_128_images/images")

# Start the UI server on port 8001. Use env variables to change port and host:
# LIGHTLY_STUDIO_PORT=8002
# LIGHTLY_STUDIO_HOST=0.0.0.0
ls.start_gui()

Run the script with python example_image.py. Now you can inspect images in the app.

Tagging by Folder Structure

When using dataset.add_images_from_path, you can automatically assign tags based on your folder structure. The folder hierarchy is relative to the path argument you provide.

For example, given a folder structure where images are classified by class:

my_data/
├── cat/
│   ├── img1.png
│   └── img2.png
├── dog/
│   ├── img3.png
│   └── img4.png
└── bird/
    └── img5.png

You can point path to the parent directory (my_data/) and use tag_depth=1 to enable this auto-tagging. The code will then use the first-level subdirectories (cat, dog, bird) as tags.

dataset.add_images_from_path(path="my_data/", tag_depth=1)

Create a file named example_video.py with the following contents:

example_video.py
import lightly_studio as ls
from lightly_studio.utils import download_example_dataset

# Download the example dataset (will be skipped if it already exists)
dataset_path = download_example_dataset(download_dir="dataset_examples")

# Create a dataset and populate it with videos.
dataset = ls.Dataset.create()
dataset.add_videos_from_path(path=f"{dataset_path}/youtube_vis_50_videos/train/videos")

# Start the UI server.
ls.start_gui()

Run the script with python example_video.py. Now you can inspect videos in the app.

To run an object detection example using a YOLO dataset, create a file named example_yolo.py with the following contents:

example_yolo.py
import lightly_studio as ls
from lightly_studio.utils import download_example_dataset

# Download the example dataset (will be skipped if it already exists)
dataset_path = download_example_dataset(download_dir="dataset_examples")

dataset = ls.Dataset.create()
dataset.add_samples_from_yolo(
    data_yaml=f"{dataset_path}/road_signs_yolo/data.yaml",
)

ls.start_gui()

Run the script with python example_yolo.py. Now you can inspect samples with their assigned annotations in the app.

The YOLO format details:

road_signs_yolo/
├── train/
│   ├── images/
│   │   ├── image1.jpg
│   │   ├── image2.jpg
│   │   └── ...
│   └── labels/
│       ├── image1.txt
│       ├── image2.txt
│       └── ...
├── valid/  (optional)
│   ├── images/
│   │   └── ...
│   └── labels/
│       └── ...
└── data.yaml

Each label file should contain YOLO format annotations (one per line):

<class> <x_center> <y_center> <width> <height>

Where coordinates are normalized between 0 and 1.

To run an instance segmentation example using a COCO dataset, create a file named example_coco.py with the following contents:

example_coco.py
import lightly_studio as ls
from lightly_studio.utils import download_example_dataset

# Download the example dataset (will be skipped if it already exists)
dataset_path = download_example_dataset(download_dir="dataset_examples")

dataset = ls.Dataset.create()
dataset.add_samples_from_coco(
    annotations_json=f"{dataset_path}/coco_subset_128_images/instances_train2017.json",
    images_path=f"{dataset_path}/coco_subset_128_images/images",
    annotation_type=ls.AnnotationType.INSTANCE_SEGMENTATION,
)

ls.start_gui()

Run the script via python example_coco.py. Now you can inspect samples with their assigned annotations in the app.

The COCO format details:

coco_subset_128_images/
├── images/
│   ├── image1.jpg
│   ├── image2.jpg
│   └── ...
└── instances_train2017.json        # Single JSON file containing all annotations

COCO uses a single JSON file containing all annotations. The format consists of three main components:

  • Images: Defines metadata for each image in the dataset.
  • Categories: Defines the object classes.
  • Annotations: Defines object instances.

To run a caption example using a COCO dataset, create a file named example_coco_captions.py with the following contents:

example_coco_captions.py
import lightly_studio as ls
from lightly_studio.utils import download_example_dataset

# Download the example dataset (will be skipped if it already exists)
dataset_path = download_example_dataset(download_dir="dataset_examples")

dataset = ls.Dataset.create()
dataset.add_samples_from_coco_caption(
    annotations_json=f"{dataset_path}/coco_subset_128_images/captions_train2017.json",
    images_path=f"{dataset_path}/coco_subset_128_images/images",
)

ls.start_gui()

Run the script with python example_coco_captions.py. Now you can inspect samples with their assigned captions in the app.

The COCO format details:

coco_subset_128_images/
├── images/
│   ├── image1.jpg
│   ├── image2.jpg
│   └── ...
└── captions_train2017.json        # Single JSON file containing all captions

COCO uses a single JSON file containing all captions. The format consists of three main components:

  • Images: Defines metadata for each image in the dataset.
  • Annotations: Defines the captions.

How It Works

  1. Your Python script uses the lightly_studio Dataset.
  2. The dataset.add_<samples>_from_<source> reads your images and annotations, calculates embeddings, and saves metadata to a local lightly_studio.db file (using DuckDB).
  3. lightly_studio.start_gui() starts a local Backend API server.
  4. This server reads from lightly_studio.db and serves data to the UI Application running in your browser (http://localhost:8001).
  5. Images are streamed directly from your disk for display in the UI.

For Linux Users

We recommend using Firefox for the best experience with embedding plots, as other browsers might not render them correctly.

Python Interface

LightlyStudio has a powerful Python interface. You can not only index datasets but also query and manipulate them using code.

Dataset

The dataset is the main entity of the python interface. It is used to setup the data, start the GUI, run queries and perform selections. It holds the connection to the database file. Every dataset writes its metadata, tags, annotations, captions, and embeddings into a DuckDB file named lightly_studio.db.

import lightly_studio as ls

# Different loading options:
dataset = ls.Dataset.create()

# You can load data directly from a folder
dataset.add_images_from_path(path="local-folder/some-local-data")

# Or you can load more data at a later point (even across sources such as cloud)
dataset.add_images_from_path(path="local-folder/some-data-not-loaded-yet")
dataset.add_images_from_path(path="gcs://my-bucket-2/path/to/more-images/")

# You can also load a dataset from an .db file (default uses the `lightly_studio.db` file in the working directory)
dataset = ls.Dataset.load()

To store the DuckDB file elsewhere (for example, on a larger external disk or to maintain isolated projects), configure the database manager before creating/loading any datasets:

from lightly_studio import db_manager

db_manager.connect(db_file="~/lightly_data/my-db-path.db")

Note

Within the .db file all paths are stored as absolute paths. This allows the software to fetch data for visualization even if you move the .db file around.

Reusing Datasets

Restarting the same Python script will reopen the GUI with the previous state as long as you call Dataset.load or Dataset.load_or_create with the same name.

reuse_dataset.py
from __future__ import annotations

import lightly_studio as ls

DATASET_NAME = "sport_shooting"
IMAGE_DIRS = ["data/primary_images", "data/new_images_later"]

# Everything persists inside lightly_studio.db automatically.
dataset = ls.Dataset.load_or_create(name=DATASET_NAME)

# Only new samples are added by `add_images_from_path`
for image_dir in IMAGE_DIRS:
    dataset.add_images_from_path(path=image_dir)

ls.start_gui()
  • When you rerun the script later, only new files are indexed. Existing embeddings and annotations remain untouched; embeddings are generated only for the new samples (set embed=False to skip).
  • Manual labels created in the GUI, metadata changed via Python, and tags assigned anywhere are all stored in lightly_studio.db, so you can stop/start the process at will.
  • External files such as images/videos (.jpg, .png files etc.) remain in the original folders; keep them accessible so the GUI can display them when you reopen the dataset.

Using Cloud Storage

To load images directly from a cloud storage provider (like AWS S3, GCS, etc.), first install the required dependencies:

pip install "lightly-studio[cloud-storage]"

This installs s3fs (for S3), gcsfs (for GCS), and adlfs (for Azure). For other providers, see the fsspec documentation.

Example: Loading images from S3

import lightly_studio as ls

dataset = ls.Dataset.create(name="s3_dataset")
dataset.add_images_from_path(path="s3://my-bucket/images/")

ls.start_gui()

The images remain in S3 and are streamed to the UI when displayed. Make sure your AWS credentials are configured (via environment variables or ~/.aws/credentials).

Current Limitations:

Cloud Storage Limitation

Cloud storage is only supported for image-only datasets using add_images_from_path() or when manually indexing the data with annotations. When loading annotated datasets with add_samples_from_coco() or add_samples_from_yolo(), both images and annotation files must be stored locally for now. The same is true for video files, they can be only loaded locally.

Sample

Each sample is a single data instance. The dataset stores references to all samples, allowing you to access, read, or update their attributes individually.

import lightly_studio as ls

dataset = ls.Dataset.load_or_create(name="my_dataset")
dataset.add_images_from_path(path="path/to/images")

# Iterating over the data in the dataset
for sample in dataset:
    # Access sample attributes
    sample.sample_id        # Sample ID (UUID)
    sample.file_name        # Image file name (str), e.g. "img1.png"
    sample.file_path_abs    # Full image file path (str), e.g. "full/path/img1.png"
    sample.tags             # The list of sample tags (list[str]), e.g. ["tag1", "tag2"]
    sample.metadata         # Dict-like access to custom metadata

    # Adding/removing tags
    sample.add_tag("needs_review")
    sample.remove_tag("needs_review")

Adding metadata to samples

You can attach custom metadata to samples, for example sensor data from a robotics application:

for sample in dataset:
    sample.metadata["camera_id"] = "front_left"
    sample.metadata["gps_lat"] = 47.3769
    sample.metadata["gps_lon"] = 8.5417
    sample.metadata["speed"] = 12.5
    sample.metadata["weather"] = "sunny"

Indexing with Predictions

If you need to index model predictions with confidence scores or work with custom annotation formats, you can use the lower-level resolver API. This is useful for ML engineers who want to analyze model outputs in LightlyStudio.

import lightly_studio as ls
from lightly_studio.models.image import ImageCreate
from lightly_studio.models.annotation.annotation_base import AnnotationCreate, AnnotationType
from lightly_studio.models.annotation_label import AnnotationLabelCreate
from lightly_studio.resolvers import image_resolver, annotation_resolver, annotation_label_resolver

dataset = ls.Dataset.create(name="predictions_dataset")

# Create label for your class (if it does not exist for the dataset)
label = annotation_label_resolver.create(
    session=dataset.session,
    label=AnnotationLabelCreate(annotation_label_name="person"),
)

# Your model predictions (e.g., from a detector)
predictions = [
    {"image": "img1.jpg", "x": 100, "y": 150, "w": 200, "h": 300, "conf": 0.95},
    {"image": "img2.jpg", "x": 50, "y": 80, "w": 120, "h": 250, "conf": 0.87},
]

for pred in predictions:
    # Add the image
    sample_ids = image_resolver.create_many(
        session=dataset.session,
        dataset_id=dataset.dataset_id,
        samples=[ImageCreate(file_name=pred["image"], file_path_abs=f"/data/{pred['image']}", width=640, height=480)],
    )

    # Add the prediction with confidence
    annotation_resolver.create_many(
        session=dataset.session,
        dataset_id=dataset.dataset_id,
        annotations=[AnnotationCreate(
            annotation_label_id=label.annotation_label_id,
            annotation_type=AnnotationType.OBJECT_DETECTION,
            parent_sample_id=sample_ids[0],
            confidence=pred["conf"],  # Model confidence, must be between 0.0 and 1.0
            x=pred["x"], y=pred["y"], width=pred["w"], height=pred["h"],
        )],
    )

Embeddings not supported

Manual indexing does not generate embeddings. Features like similarity search and embedding plots will not be available for manually indexed samples.

Dataset Query

You can programmatically filter samples by attributes (e.g., image size, tags), sort them, and select subsets. This is useful for creating training/validation splits, finding specific samples, or exporting filtered data.

GUI Support

These filtering and querying operations can also be performed directly for image datasets in the GUI using the search and filter panels.

from lightly_studio.core.dataset_query import AND, OR, NOT, OrderByField, SampleField

# QUERY: Define a lazy query, composed by: match, order_by, slice
# match: Find all samples that need labeling plus small samples (< 500px) that haven't been reviewed.
query = dataset.match(
    OR(
        AND(
            SampleField.width < 500,
            NOT(SampleField.tags.contains("reviewed"))
        ),
        SampleField.tags.contains("needs-labeling")
    )
)

# order_by: Sort the samples by their width descending.
query.order_by(
    OrderByField(SampleField.width).desc()
)

# slice: Extract a slice of samples.
query[10:20]

# chaining: The query can also be constructed in chained way
query = dataset.match(...).order_by(...)[...]

# Ways to consume the query
# Tag this subset for easy filtering in the UI.
query.add_tag("needs-review")

# Iterate over resulting samples
for sample in query:
    # Access the sample: see previous section

# Collect all resulting samples as list
samples = query.to_list()

# Export all resulting samples in coco format
query.export().to_coco_object_detections()

Reference

You can define query filters with:

query.match(<expression>)
To create an expression for filtering on certain sample fields, the SampleField.<field_name> <operator> <value> syntax can be used. Available field names can be seen in SampleField.

Examples:

from lightly_studio.core.dataset_query import SampleField

# Ordinal fields: <, <=, >, >=, ==, !=
expr = SampleField.height >= 10            # All samples with images that are taller than 9 pixels
expr = SampleField.width == 10             # All samples with images that are exactly 10 pixels wide
expr = SampleField.created_at > datetime   # All samples created after datetime (actual datetime object)

# String fields: ==, !=
expr = SampleField.file_name == "some"     # All samples with "some" as file name
expr = SampleField.file_path_abs != "other" # All samples that are not having "other" as file_path

# Tags: contains()
expr = SampleField.tags.contains("dog")    # All samples that contain the tag "dog"

# Assign any of the previous expressions to a query:
query.match(expr)

The filtering on individual fields can flexibly be combined to create more complex match expression. For this, the boolean operators AND, OR, and NOT are available. Boolean operators can arbitrarily be nested.

Examples:

from lightly_studio.core.dataset_query import AND, OR, NOT, SampleField

# All samples with images that are between 10 and 20 pixels wide
expr = AND(
    SampleField.width > 10,
    SampleField.width < 20
)

# All samples with file names that are either "a" or "b"
expr = OR(
    SampleField.file_name == "a",
    SampleField.file_name == "b"
)

# All samples which do not contain a tag "dog"
expr = NOT(SampleField.tags.contains("dog"))

# All samples for a nested expression
expr = OR(
    SampleField.file_name == "a",
    SampleField.file_name == "b",
    AND(
        SampleField.width > 10,
        SampleField.width < 20,
        NOT(
            SampleField.tags.contains("dog")
        ),
    ),
)

# Assign any of the previous expressions to a query:
query.match(expr)

Setting the sorting of a query can be done by

query.order_by(<expression>)

The order expression can be defined by OrderByField(SampleField.<field_name>).<order_direction>().

Examples:

from lightly_studio.core.dataset_query import OrderByField, SampleField

# Sort the query by the width of the image in ascending order
expr = OrderByField(SampleField.width)
expr = OrderByField(SampleField.width).asc()

# Sort the query by the file name in descending order
expr = OrderByField(SampleField.file_name).desc()

# Assign any of the previous expressions to a query:
query.order_by(expr)

Setting the slicing of a query can be done by:

query.slice(<offset>, <limit>)
# OR
query[<offset>:<stop>]

Examples:

# Slice 2:5
query.slice(offset=2, limit=3)
query[2:5]

# Slice :5
query.slice(limit=5)
query[:5]

# Slice 5:
query.slice(offset=5)
query[5:]


Selection

LightlyStudio offers a premium feature to perform automatized data selection. Selecting the right subset of your data can save labeling cost and training time while improving model quality.

Prerequisite: The selection functionality requires a valid LightlyStudio license key. Set the LIGHTLY_STUDIO_LICENSE_KEY environment variable before using selection features:

export LIGHTLY_STUDIO_LICENSE_KEY="license_key_here"
$env:LIGHTLY_STUDIO_LICENSE_KEY="license_key_here"

You can choose from various and even combined selection strategies:

Diversity selection can be configured directly from a DatasetQuery. The example below showcases a simple case of selecting diverse samples.

import lightly_studio as ls

# Load your dataset
dataset = ls.Dataset.load_or_create()
dataset.add_images_from_path(path="/path/to/image_dataset")

# Select a diverse subset of 10 samples.
dataset.query().selection().diverse(
    n_samples_to_select=10,
    selection_result_tag_name="diverse_selection",
)

ls.start_gui()

You can select samples based on the values of a metadata field. The example below showcases a simple case of selecting samples with the highest metadata value (typicality). Typicality is calculated for the given dataset first.

import lightly_studio as ls

# Load your dataset
dataset = ls.Dataset.load_or_create()
dataset.add_images_from_path(path="/path/to/image_dataset")
# Compute and store 'typicality' metadata.
dataset.compute_typicality_metadata(metadata_name="typicality")

# Select the 5 samples with the highest 'typicality' scores.
dataset.query().selection().metadata_weighting(
    n_samples_to_select=5,
    selection_result_tag_name="metadata_weighting_selection",
    metadata_key="typicality",
)

You can select samples based on their similarity to a specific subset of your data. The example below shows how to select samples that are most similar to a set of pre-tagged images.

import lightly_studio as ls

# Load your dataset
dataset = ls.Dataset.load_or_create()
dataset.add_images_from_path(path="/path/to/image_dataset")

# First, define a query set by tagging some samples.
# For example, let's tag the first 5 samples.
dataset[:5].add_tag("my_query_samples")

# Compute similarity to the tagged samples and store it as
# 'similarity_to_query' metadata.
dataset.compute_similarity_metadata(
    query_tag_name="my_query_samples",
    metadata_name="similarity_to_query"
)

# Select the 10 samples most similar to the query set.
dataset.query().selection().metadata_weighting(
    n_samples_to_select=10,
    selection_result_tag_name="similar_to_query_selection",
    metadata_key="similarity_to_query",
)

You can select samples based on the distribution of object classes (annotations). This is useful for fixing class imbalance, e.g., ensuring you have enough "pedestrians" in a driving dataset.

Note: This strategy requires the dataset to have annotations, e.g., loaded via add_samples_from_coco or add_samples_from_yolo.

import lightly_studio as ls

# Load your dataset
dataset = ls.Dataset.load_or_create()

# Option 1: Balance classes uniformly (e.g. equal number of cats and dogs)
dataset.query().selection().annotation_balancing(
    n_samples_to_select=50,
    selection_result_tag_name="balanced_uniform",
    target_distribution="uniform",
)

# Option 2: Define a specific target distribution (e.g. 20% cat, 80% dog)
dataset.query().selection().annotation_balancing(
    n_samples_to_select=50,
    selection_result_tag_name="balanced_custom",
    target_distribution={"cat": 0.2, "dog": 0.8},
)

You can configure multiple strategies, the selection takes into account all of them at the same time, weighted by the strength parameter.

import lightly_studio as ls
from lightly_studio.selection.selection_config import (
    MetadataWeightingStrategy,
    EmbeddingDiversityStrategy,
)

# Load your dataset
dataset = ls.Dataset.load_or_create()
dataset.add_images_from_path(path="/path/to/image_dataset")
# Compute typicality and store it as `typicality` metadata
dataset.compute_typicality_metadata(metadata_name="typicality")

# Select 10 samples by combining typicality and diversity, diversity having double the strength.
dataset.query().selection().multi_strategies(
    n_samples_to_select=10,
    selection_result_tag_name="multi_strategy_selection",
    selection_strategies=[
        MetadataWeightingStrategy(metadata_key="typicality", strength=1.0),
        EmbeddingDiversityStrategy(embedding_model_name="my_model_name", strength=2.0),
    ],
)

Exporting Selected Samples

The selected sample paths can be exported via the GUI, or by a script:

import lightly_studio as ls
from lightly_studio.core.dataset_query import SampleField

dataset = ls.Dataset.load("my-dataset")
selected_samples = (
    dataset.match(SampleField.tags.contains("diverse_selection")).to_list()
)

with open("export.txt", "w") as f:
    for sample in selected_samples:
        f.write(f"{sample.file_path_abs}\n")

API Reference

See the Python API for more details on the python interface.