Image Dataset
This guide explains how to load images into LightlyStudio, how to explore them in the GUI, and how to use the Python API to query and manipulate them.
Load an Image Dataset
From a Folder
Use add_images_from_path to load images from a folder:
import lightly_studio as ls

# We download an example dataset for this guide.
download_path = ls.utils.download_example_dataset(download_dir="dataset_examples")

# Create an empty dataset and add images from a folder.
dataset = ls.ImageDataset.create()
dataset.add_images_from_path(path=f"{download_path}/coco_subset_128_images/images")
The ls.ImageDataset.create() method call is lightweight and initializes an empty dataset.
The add_images_from_path(...) method accepts a path to a file or a folder. If the path is a folder,
it will recursively search for images in it. A remote path like s3://my-bucket/my-folder is also
supported, see Using Cloud Storage for more details.
Added images are automatically embedded so that embedding plot and image search are enabled.
To skip embedding, pass embed=False to the method.
The method supports additional arguments, e.g. you can pass tag_depth=1 to add the image parent
folder name as a tag to each sample. See the API reference for full details.
From an Annotation Format
ImageDataset class exposes methods to load images with annotations from a number of
standard formats. See API reference for full details.
import lightly_studio as ls

# Download the example dataset (will be skipped if it already exists)
dataset_path = ls.utils.download_example_dataset(download_dir="dataset_examples")

dataset = ls.ImageDataset.create()
dataset.add_samples_from_yolo(
    data_yaml=f"{dataset_path}/road_signs_yolo/data.yaml",
)
The YOLO format details:
The dataset structure is:
road_signs_yolo/
├── train/
│   ├── images/
│   │   ├── image1.jpg
│   │   ├── image2.jpg
│   │   └── ...
│   └── labels/
│       ├── image1.txt
│       ├── image2.txt
│       └── ...
├── valid/  (optional)
│   ├── images/
│   │   └── ...
│   └── labels/
│       └── ...
└── data.yaml
Each label file contains YOLO format annotations (one per line):
<class> <x_center> <y_center> <width> <height>
Where coordinates are normalized between 0 and 1.
import lightly_studio as ls

# Download the example dataset (will be skipped if it already exists)
dataset_path = ls.utils.download_example_dataset(download_dir="dataset_examples")

dataset = ls.ImageDataset.create()
dataset.add_samples_from_coco(
    annotations_json=f"{dataset_path}/coco_subset_128_images/instances_train2017.json",
    images_path=f"{dataset_path}/coco_subset_128_images/images",
)
The COCO format details:
coco_subset_128_images/
├── images/
│   ├── image1.jpg
│   ├── image2.jpg
│   └── ...
└── instances_train2017.json        # Single JSON file containing all annotations
COCO uses a single JSON file containing all annotations. The format consists of three main components:
- Images: Defines metadata for each image in the dataset.
- Categories: Defines the object classes.
- Annotations: Defines object bounding boxes. Note that in the example dataset the file contains also instance segmentation information, however we load just the bounding boxes.
import lightly_studio as ls

# Download the example dataset (will be skipped if it already exists)
dataset_path = ls.utils.download_example_dataset(download_dir="dataset_examples")

dataset = ls.ImageDataset.create()
dataset.add_samples_from_coco(
    annotations_json=f"{dataset_path}/coco_subset_128_images/instances_train2017.json",
    images_path=f"{dataset_path}/coco_subset_128_images/images",
    annotation_type=ls.AnnotationType.INSTANCE_SEGMENTATION,
)
The COCO format details:
coco_subset_128_images/
├── images/
│   ├── image1.jpg
│   ├── image2.jpg
│   └── ...
└── instances_train2017.json        # Single JSON file containing all annotations
COCO uses a single JSON file containing all annotations. The format consists of three main components:
- Images: Defines metadata for each image in the dataset.
- Categories: Defines the object classes.
- Annotations: Defines object instances.
import lightly_studio as ls

# Download the example dataset (will be skipped if it already exists)
dataset_path = ls.utils.download_example_dataset(download_dir="dataset_examples")

dataset = ls.ImageDataset.create()
dataset.add_samples_from_coco_caption(
    annotations_json=f"{dataset_path}/coco_subset_128_images/captions_train2017.json",
    images_path=f"{dataset_path}/coco_subset_128_images/images",
)
The COCO format details:
coco_subset_128_images/
├── images/
│   ├── image1.jpg
│   ├── image2.jpg
│   └── ...
└── captions_train2017.json        # Single JSON file containing all captions
COCO uses a single JSON file containing all captions. The format consists of two main components:
- Images: Defines metadata for each image in the dataset.
- Annotations: Defines the captions.
import json
from pathlib import Path

import lightly_studio as ls

# Download the example dataset (will be skipped if it already exists)
dataset_path = ls.utils.download_example_dataset(download_dir="dataset_examples")

# Load a mapping from class IDs to class names. The mapping is not a part of the Pascal VOC format.
class_id_to_name_path = f"{dataset_path}/voc2012_10_images/class_id_to_name.json"
json_dict = json.loads(Path(class_id_to_name_path).read_text())
class_id_to_name = {int(k): v for k, v in json_dict.items()}

# Create an image dataset and add samples from Pascal VOC format.
dataset = ls.ImageDataset.create()
dataset.add_samples_from_pascal_voc_segmentations(
    images_path=f"{dataset_path}/voc2012_10_images/JPEGImages",
    masks_path=f"{dataset_path}/voc2012_10_images/SegmentationClass",
    class_id_to_name=class_id_to_name,
)
To load Pascal VOC format, the mapping from class IDs to class names is not a part of the format and must be provided separately. In the example above, we load it from a JSON file, but you can also create it manually in Python.
The Pascal VOC format details:
dataset/
├── images/
│   ├── image1.jpg
│   ├── image2.jpg
│   └── ...
└── masks/
    ├── image1.png
    ├── image2.png
    └── ...
Each mask is a PNG image where each pixel value corresponds to a class ID.
In the example above, we load a mapping from class IDs to class names from a JSON file in this format:
{
    "0": "background",
    "1": "aeroplane",
    "2": "bicycle",
    ...
}
import lightly_studio as ls

# Download the example dataset (will be skipped if it already exists)
dataset_path = ls.utils.download_example_dataset(download_dir="dataset_examples")

dataset = ls.ImageDataset.create()
dataset.add_samples_from_lightly(
    input_folder=f"{dataset_path}/coco_subset_128_images/predictions",
)
Images are by default expected to be in the ../images folder, you can specify
images_rel_path to change it if needed.
The Lightly format details:
dataset/
├── images/
│   ├── image1.jpg
│   └── image2.jpg
└── predictions/
    ├── schema.json
    ├── image1.json
    └── image2.json
The prediction folder contains a schema.json file defining the task type and
categories, and one JSON file per image with the predictions.
The schema.json file defines the task type and the list of categories:
{
    "task_type": "object-detection",
    "categories": [
        {"id": 0, "name": "person"},
        {"id": 1, "name": "bicycle"},
        {"id": 2, "name": "car"},
        ...
    ]
}
Each per-image JSON file contains the file name and a list of predictions with
bounding boxes in [x, y, w, h] format (top-left corner, width, height) and
an optional confidence score:
{
    "file_name": "000000001732.jpg",
    "predictions": [
        {"category_id": 0, "bbox": [223, 105, 115, 372], "score": 0.95},
        {"category_id": 26, "bbox": [204, 240, 38, 70], "score": 0.8},
        {"category_id": 28, "bbox": [35, 385, 209, 88], "score": 0.6}
    ]
}
From a Pre-Existing Dataset
Once a dataset is populated, the data is stored in a database. It can be loaded later as follows to skip indexing and embedding it again:
import lightly_studio as ls

# Load an existing dataset from the database.
dataset = ls.ImageDataset.load()

# A helper method that creates a dataset only if it does not exist yet.
dataset = ls.ImageDataset.load_or_create()
All three functions create(), load(), and load_or_create() accept an optional name argument
to store multiple datasets in the database, note however that the open-source version of LightlyStudio
GUI displays only a single dataset.
Tip
The add_images_from_path(...) and add_samples_from_x(...) methods skip
duplicate images, the duplicates are detected based on absolute path.
Therefore you can safely use them in a single script with load_or_create(),
adding and embedding the images will be skipped on subsequent calls.
Image Dataset in the GUI
Launch the GUI from your terminal:
lightly-studio gui
The command starts a local web server. Click the link printed in the console - by default
http://localhost:8001 - to open the GUI in your browser. Note that the GUI can also be
started from a Python script by calling ls.start_gui().
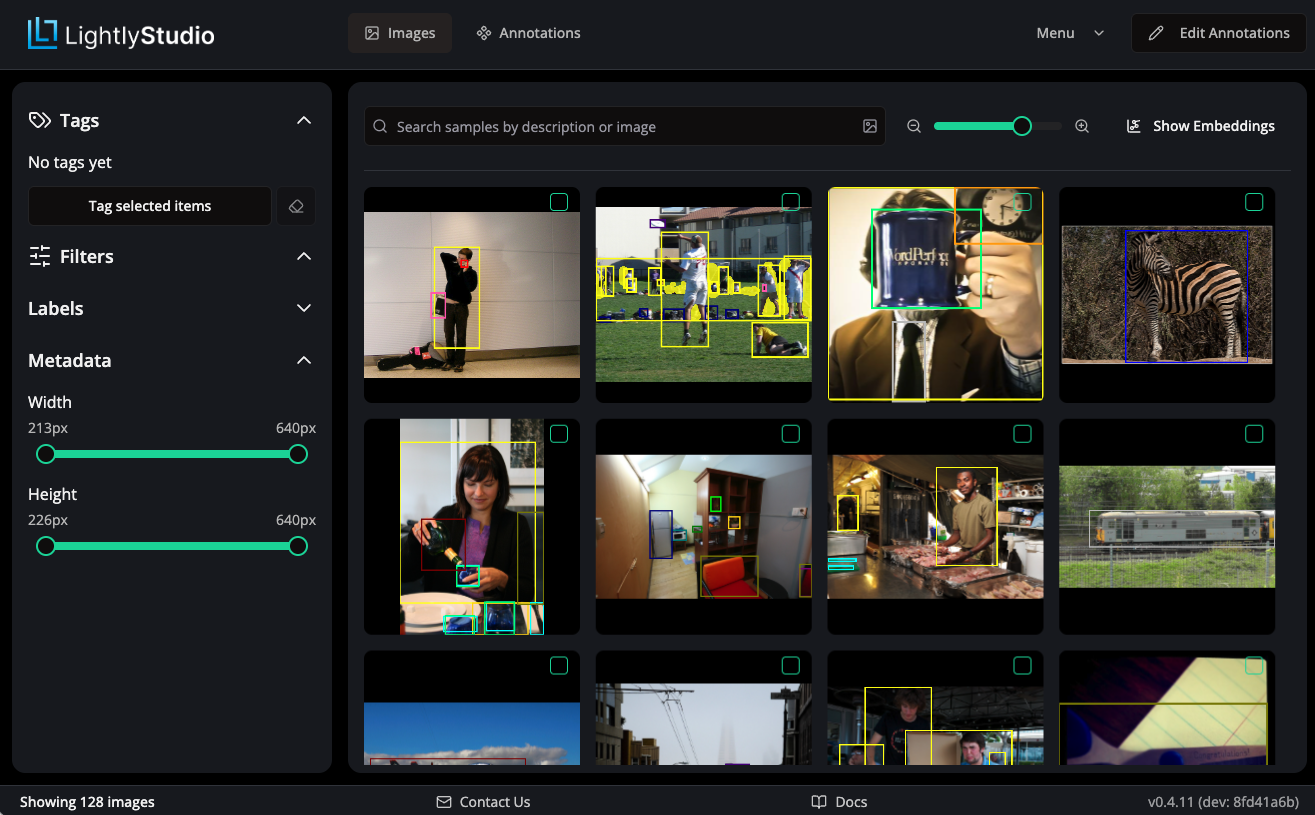
Grid View
The main view shows a grid of images in your dataset. From here, you can perform multiple actions:
- Use the left panel to filter the images by tags, annotation labels or metadata.
- Use the search bar to do similarity search by text or an image.
- Use the
Show Embeddingsbutton to explore the data in embedding space. - Use the
Menudropdown for further actions like plugins, sampling, classification, export and more.
Refer to dedicated pages in this documentation on every feature for more details.
Detail View
Double-clicking on an image opens the image detail view. Here you can annotate the image, add captions or view metadata.
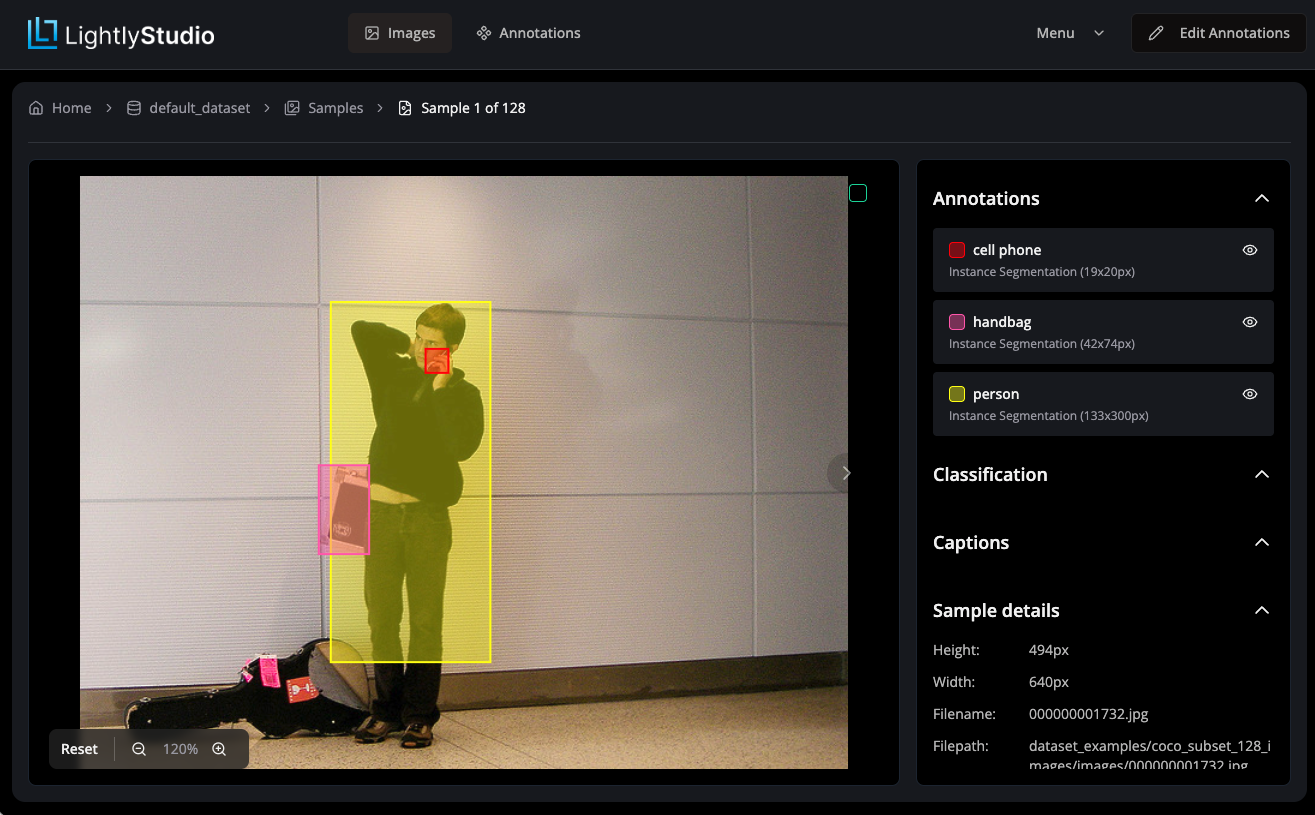
Image Dataset in the Python API
ImageDataset class
The main entrypoint is the ImageDataset class. An instance of it can be created as described above by using one of the factory methods:
dataset = ls.ImageDataset.create()
dataset = ls.ImageDataset.load()
dataset = ls.ImageDataset.load_or_create()
Once samples are added to the dataset, they can be iterated over, yielding ImageSample objects:
for image in dataset:
    print(image.file_name)
ImageSample class
ImageSample class provides read and write access to the image data.
# Grab one sample
image = next(iter(dataset))

# Image properties
print(image.file_name)
print(image.file_path_abs)
print(image.width)
print(image.height)

# Tags
image.tags = ["tag1", "tag2"]
image.add_tag("needs_review")
image.remove_tag("needs_review")
print(image.tags)

# Captions
image.captions = ["Caption 1", "Caption 2"]
image.add_caption("Caption 3")
print(image.captions)

# Metadata
image.metadata["my_key"] = "my_value"
print(image.metadata["my_key"])

# Annotations
from lightly_studio.core.annotation import CreateObjectDetection
image.add_annotation(
    CreateObjectDetection(
        label="dog",
        x=10,
        y=20,
        width=30,
        height=40,
        confidence=0.9,
    )
)
for annotation in image.annotations:
    print(annotation.label)
Querying the Dataset
Use Dataset Query in Python when you need reusable subsets in code for filtering, sorting, slicing, export, or selection. Image query expressions use ImageSampleField.