Active Learning for Transactions of Images
Applications like autonomous driving or identity verification have groups (transactions) of images. Use active learning to find relevant transactions.
In many computer vision applications there are scenarios where one has to work with multiple images that belong to the same transaction. In autonomous driving for example, it's common to have stereo vision. Another case is ID verification where the front view and the back view of a document belong to the same transaction. In these scenarios, it's important to select the full transaction when doing active learning while considering all image instances in the transaction.
Prerequisites
For this tutorial, you'll require the following prerequisites:
- Have LightlyOne installed and setup.
- Access to a cloud bucket to which you can upload your dataset. This tutorial will use an AWS S3 bucket.
Python 3.7or newer and an installation of LightlyOne.opencv-python. You can install it with pip.
Download the DrivingStereo Dataset
The DrivingStereo dataset consists of more than 170'000 pairs of images from cameras on the left and the right of the car. For this tutorial, we'll only use the 2000 pairs of images that have additional weather data. They can be downloaded from the Different weathers section.

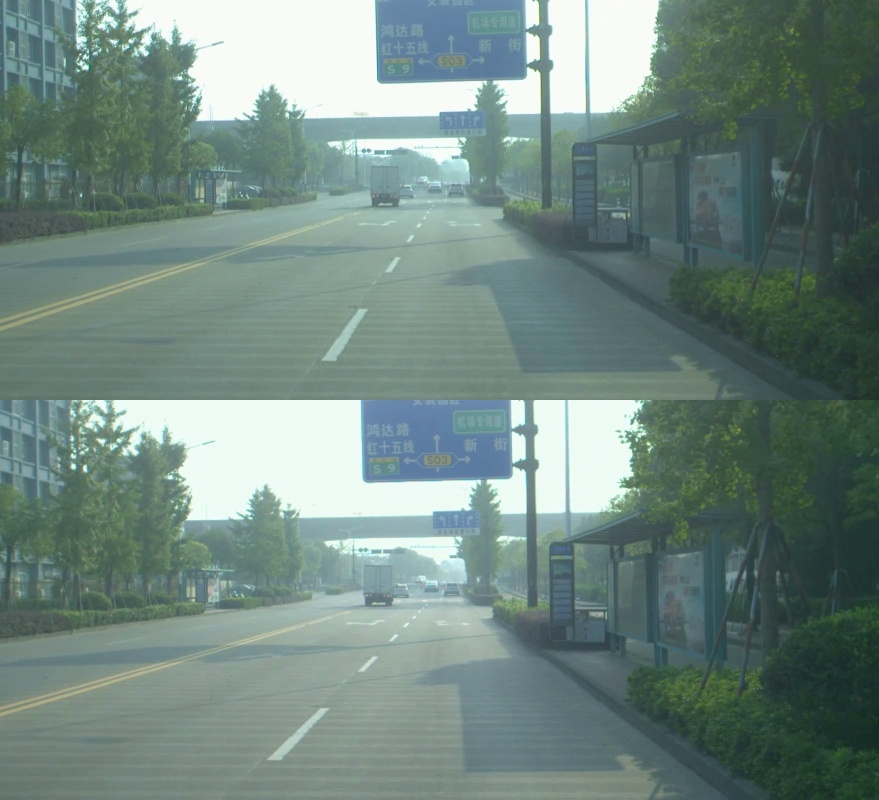
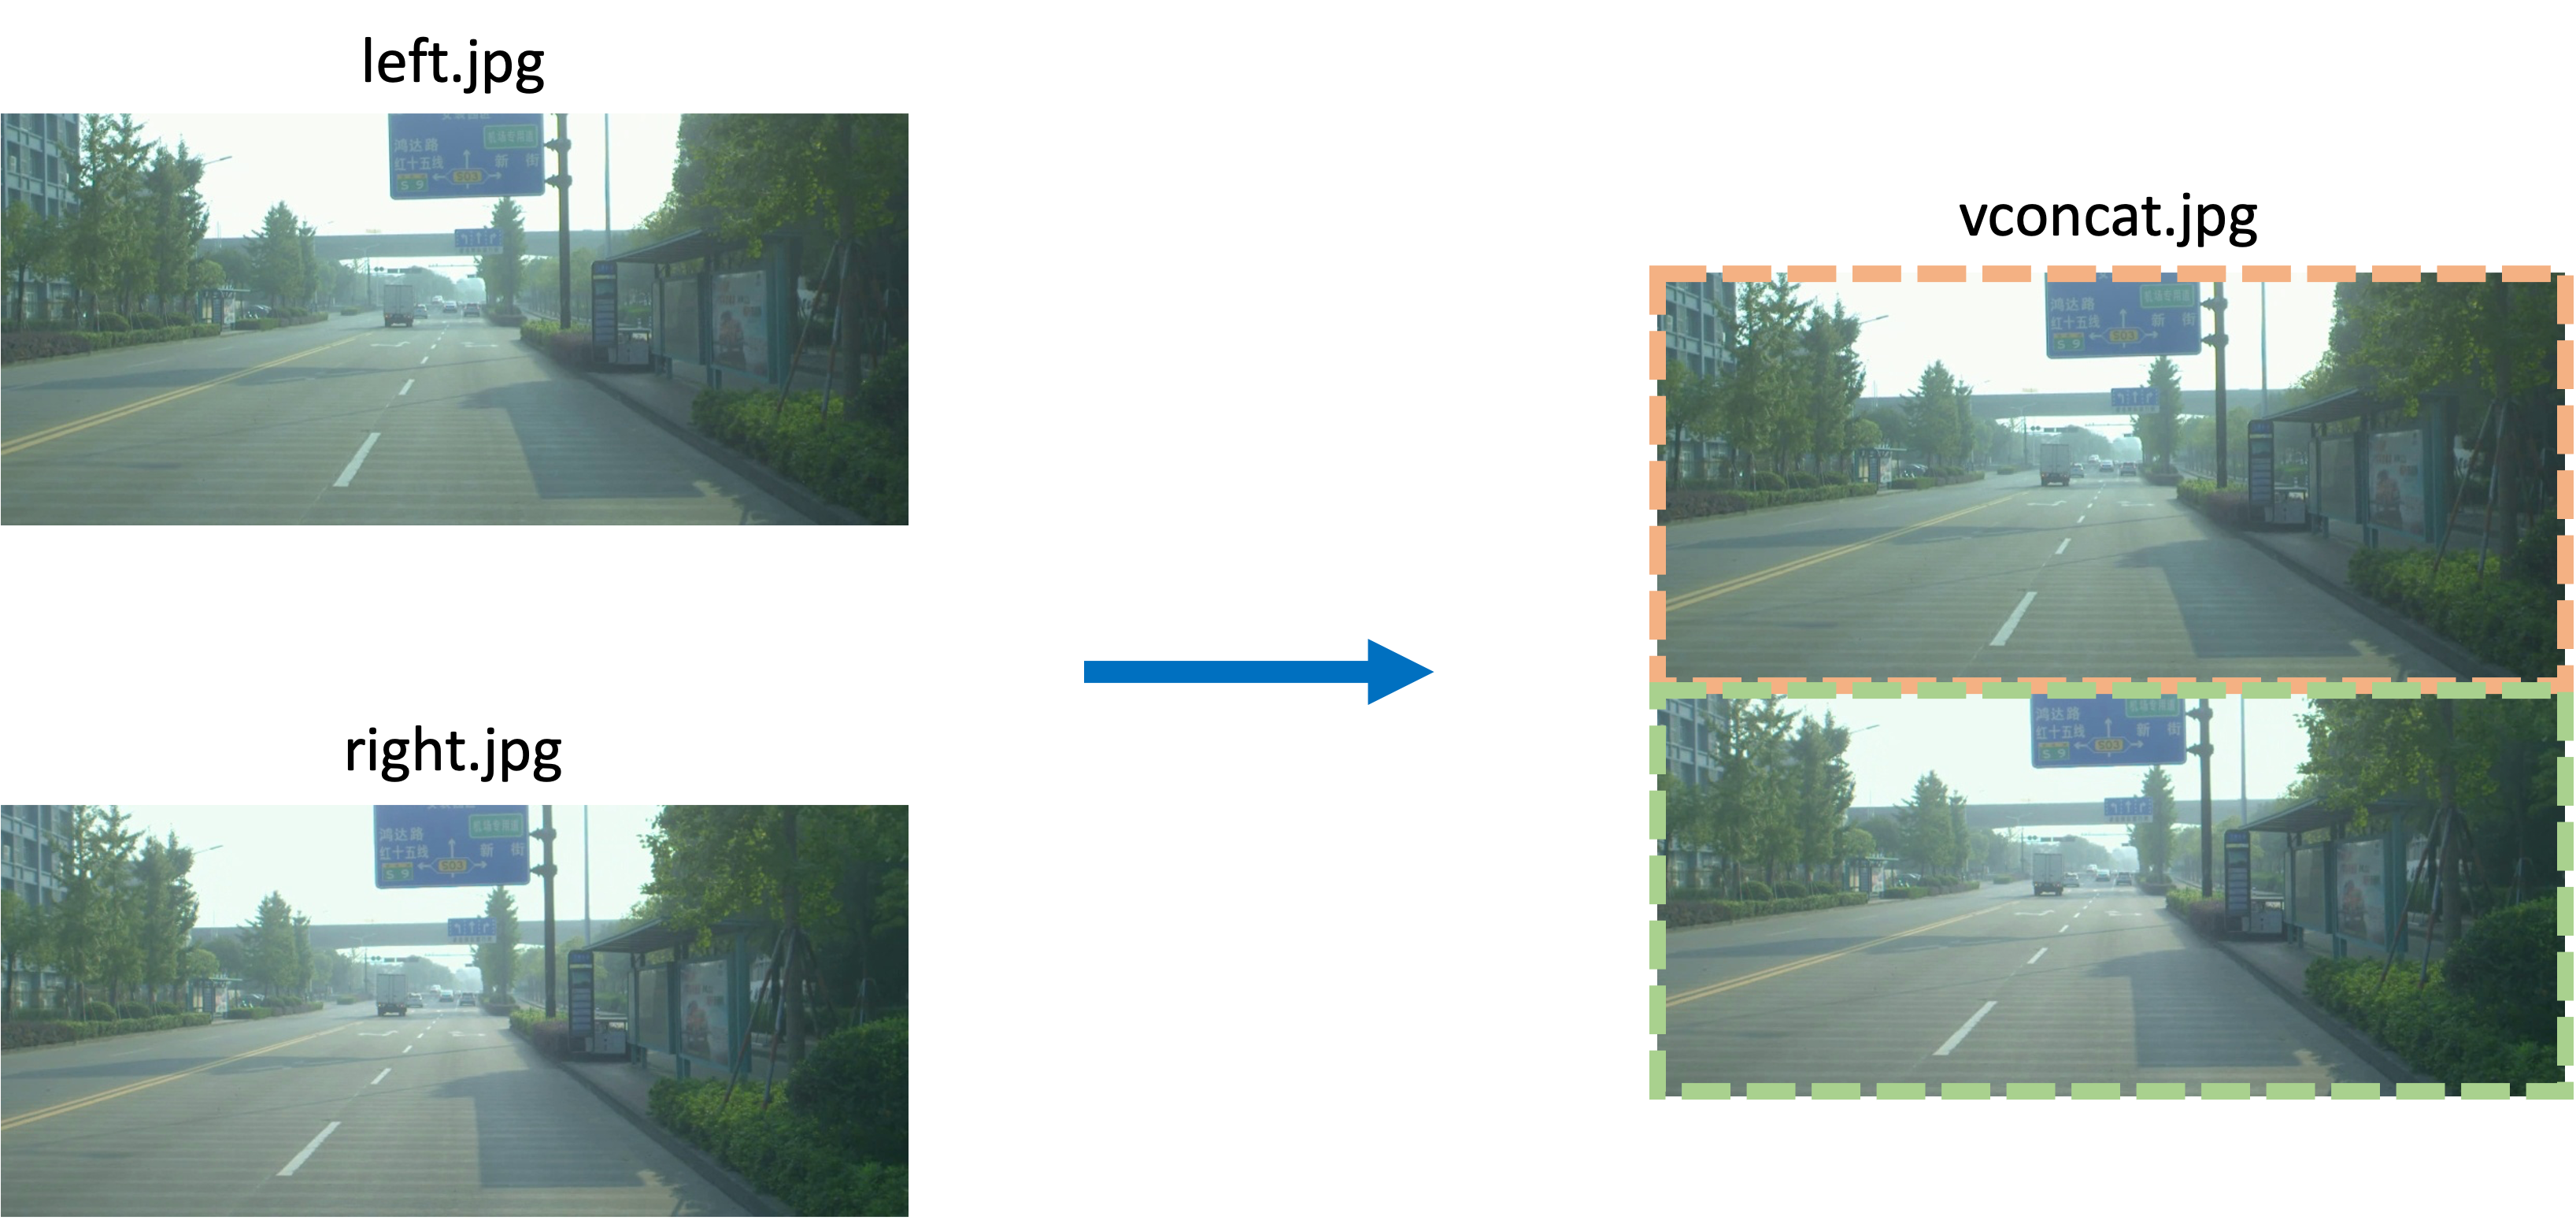
Example of a transaction from the DrivingStereo dataset: Two images (left and right) taken from the same vehicle. The images were vertically concatenated for visualization purposes.
To download the dataset, first, we download the following eight subsets and extract them in the raw directory:
rainy/left-image-half-size.ziprainy/right-image-half-size.zipsunny/left-image-half-size.zipsunny/right-image-half-size.zipcloudy/left-image-half-size.zipcloudy/right-image-half-size.zipfoggy/left-image-half-size.zipfoggy/right-image-half-size.zip
We can use the following script to download the data and extract it in the right place:
from argparse import ArgumentParser
import subprocess
import shutil
from pathlib import Path


def runcmd(cmd: str, verbose: bool = False):

    process = subprocess.Popen(
        cmd, stdout=subprocess.PIPE, stderr=subprocess.PIPE, text=True, shell=True
    )
    std_out, std_err = process.communicate()
    if verbose:
        print(std_out.strip(), std_err)
    pass


def download_and_extract_zip(file_id: str, extract_dir: Path):
    temp_zip_file_path = "/tmp/file.zip"
    # Credits for wget command: https://medium.com/@acpanjan/download-google-drive-files-using-wget-3c2c025a8b99
    runcmd(
        f"wget --load-cookies /tmp/cookies.txt \"https://docs.google.com/uc?export=download&confirm=$(wget --quiet --save-cookies /tmp/cookies.txt --keep-session-cookies --no-check-certificate 'https://docs.google.com/uc?export=download&id={file_id}' -O- | sed -rn 's/.*confirm=([0-9A-Za-z_]+).*/\1\n/p')&id={file_id}\" -O '{str(temp_zip_file_path)}' && rm -rf /tmp/cookies.txt"
    )
    shutil.unpack_archive(temp_zip_file_path, extract_dir=base_directory)
    runcmd(f"rm {temp_zip_file_path}")


filenames_and_ids = [
    ("sunny/left-image-half-size.zip", "12XjXwkZ54-wvVdqMcZhWC8bzX1yZASQ5"),
    ("sunny/right-image-half-size.zip", "1OyHFo_7VTZjLlirbj-rcclMC2pS8kBDz"),
    ("cloudy/left-image-half-size.zip", "1PzXmNjo4fmL8H_pOQCZ92BjezOxaXCYQ"),
    ("cloudy/right-image-half-size.zip", "1IEOyws7k5qnlCqTQPEj_BMxQvMF8GKE1"),
    ("foggy/left-image-half-size.zip", "1zOm64tgkPL_k7wkUH5y_i0eMeMRj9Dfe"),
    ("foggy/right-image-half-size.zip", "1ll3SvdNZIUytEZfEMv0cCjSaowlGbK5X"),
    ("rainy/left-image-half-size.zip", "167gGmTTTnLMxi6Z9AELy63LsRXXSR_G6"),
    ("rainy/right-image-half-size.zip", "1kygLdSD48LkVGI4eLJg_RG1Hg29jsoAV"),
]


if __name__ == "__main__":

    parser = ArgumentParser()
    parser.add_argument("--output-dir", type=str)
    args = parser.parse_args()

    base_directory = Path(args.output_dir)
    base_directory.mkdir(parents=True, exist_ok=True)

    for filename, file_id in filenames_and_ids:
        print(f"Downloading and extracting {filename}...")
        download_and_extract_zip(
            file_id=file_id,
            extract_dir=base_directory
        )
print(f"Finished downloading and extracting {filename}.")python download_driving_stereo.py --output-dir /datasets/DrivingStereo/rawThe resulting folder structure should look like this:
/datasets/DrivingStereo/raw/
├── cloudy
│   ├── left-image-half-size/
│   └── right-image-half-size/
├── foggy
│   ├── left-image-half-size/
│   └── right-image-half-size/
├── rainy
│   ├── left-image-half-size/
│   └── right-image-half-size/
└── sunny
    ├── left-image-half-size/
    └── right-image-half-size/
Now, we shuffle the images around a bit to create a more typical folder structure where every transaction (left and right image) is stored in a separate directory. The script below will do this for us.
import shutil
from pathlib import Path
from argparse import ArgumentParser


if __name__ == "__main__":

    parser = ArgumentParser()
    parser.add_argument("--input-dir", type=str)
    parser.add_argument("--output-dir", type=str)
    args = parser.parse_args()

    input_dir = Path(args.input_dir)
    output_dir = Path(args.output_dir)

    if not input_dir.is_dir():
        raise RuntimeError(f"Input dir '{str(input_dir)} does not exist!'")

    print(f"Preparing DrivingStereo in '{str(output_dir)}'")

    for suffix in ["cloudy", "foggy", "rainy", "sunny"]:
        sub_input_dir = input_dir / suffix
        sub_output_dir = output_dir / suffix

        input_files_left = list(sub_input_dir.glob("*left*/*.jpg"))
        input_files_right = list(sub_input_dir.glob("*right*/*.jpg"))

        assert len(input_files_left) == len(input_files_right)
        print(f"Found {len(input_files_left)} images in '{str(sub_input_dir)}'")

        for input_file_left, input_file_right in zip(
            input_files_left, input_files_right
        ):

            assert input_file_left.name == input_file_right.name
            transactions_output_dir = sub_output_dir / input_file_left.stem
            transactions_output_dir.mkdir(exist_ok=True, parents=True)

            shutil.copyfile(
                str(input_file_left), str(transactions_output_dir / "left.jpg")
            )
            shutil.copyfile(
                str(input_file_right), str(transactions_output_dir / "right.jpg")
            )

    print("Done!")
Let's run it with the appropriate parameters:
python prepare_driving_stereo.py \
    --input-dir /datasets/DrivingStereo/raw/ \
    --output-dir /datasets/DrivingStereo/data/
The full directory structure would be too big to show in this tutorial but here's a sneak peak:
/datasets/DrivingStereo/data/
├── cloudy
...
└── sunny
    ...
    └── 2018-10-19-09-30-39_2018-10-19-09-31-02-413
        ├── left.jpg
        └── right.jpg
Now we have everything in place to get started! In the next section, we'll look at how to concatenate the images from a transaction and how to add bounding boxes such that the LightlyOne Worker can still identify the original images.
Set Up the Transactions
In order for the LightlyOne Worker to consider the transaction as one, we need to stitch the single images together.

In order to work with transactions in LightlyOne we can combine them in a single image and treat the individual parts as bounding box objects.
We will then add bounding boxes for each of the original images. That way the LightlyOne Worker can make the selection based on individual images but still select full transactions. The script below does the following things
- It loads all images from the left and right cameras.
- It concatenates them and saves the resulting image as
vconcat.jpgin the output directory. - It creates bounding boxes for each image in the transaction in the Lightly Format and stores them in another directory. These bounding boxes are used to select transactions based on the individual images.
- It creates a Metadata File for each transaction containing the information about the weather. These are used for visualization but could be used for balancing, too.
import cv2
import json
from pathlib import Path
from argparse import ArgumentParser


if __name__ == "__main__":

    parser = ArgumentParser()
    parser.add_argument("--input-dir", type=str)
    parser.add_argument("--output-dir", type=str)
    parser.add_argument("--lightly-dir", type=str)
    args = parser.parse_args()

    input_dir = Path(args.input_dir)
    output_dir = Path(args.output_dir)
    lightly_dir = Path(args.lightly_dir)

    if not input_dir.is_dir():
        raise RuntimeError(f"Input dir '{str(input_dir)} does not exist!'")

    print(f"Creating transactions in '{str(output_dir)}' and bounding boxes in '{str(lightly_dir)}'")

    input_paths_left = input_dir.glob("*/*/left.jpg")
    input_paths_right = input_dir.glob("*/*/right.jpg")

    for input_path_left, input_path_right in zip(input_paths_left, input_paths_right):

        assert str(input_path_left.parents) == str(input_path_right.parents)
        relative_input_path = input_path_left.relative_to(input_dir)
        output_path = output_dir / relative_input_path.parent / "vconcat.jpg"
        output_path.parent.mkdir(exist_ok=True, parents=True)

        # Concatenate images vertically.
        image_left = cv2.imread(str(input_path_left))
        image_right = cv2.imread(str(input_path_right))
        image_concatenated = cv2.vconcat([image_left, image_right])
        cv2.imwrite(str(output_path), image_concatenated)

        # Create "prediction" with one bounding box for each of the images.
        height, width, _ = image_left.shape
        prediction = {
            "predictions": [
                {
                    "category_id": 0,
                    "bbox": [0, 0, width, height],
                    "score": 1.0,
                },
                {
                    "category_id": 1,
                    "bbox": [0, height, width, height],
                    "score": 1.0,
                },
            ],
        }
        prediction_path = (
            lightly_dir
            / "predictions/transactions/"
            / output_path.relative_to(output_dir).with_suffix(".json")
        )
        prediction_path.parent.mkdir(exist_ok=True, parents=True)
        with prediction_path.open("w") as f:
            json.dump(prediction, f)

        # Create metadata file
        metadata = {
            "type": "image",
            "metadata": {"weather": output_path.relative_to(output_dir).parts[0]},
        }
        metadata_path = (
            lightly_dir
            / "metadata"
            / output_path.relative_to(output_dir).with_suffix(".json")
        )
        metadata_path.parent.mkdir(exist_ok=True, parents=True)
        with metadata_path.open("w") as f:
            json.dump(metadata, f)

    # Create tasks.json
    tasks = ["transactions"]
    tasks_path = lightly_dir / "predictions/tasks.json"
    with tasks_path.open("w") as f:
        json.dump(tasks, f)

    # Create the prediction schema.
    prediction_schema = {
        "task_type": "object-detection",
        "categories": [
            {
                "id": 0,
                "name": "left",
            },
            {"id": 1, "name": "right"},
        ],
    }
    prediction_schema_path = lightly_dir / "predictions/transactions/schema.json"
    with prediction_schema_path.open("w") as f:
        json.dump(prediction_schema, f)

    # Create the metadata schema
    metadata_schema = [
        {
            "name": "Weather",
            "path": "weather",
            "defaultValue": "none",
            "valueDataType": "CATEGORICAL_STRING",
        }
    ]
    metadata_schema_path = lightly_dir / "metadata/schema.json"
    with metadata_schema_path.open("w") as f:
        json.dump(metadata_schema, f)

    print("Done!")
Let's run the script with the following arguments:
input-diris the input directory of transactions. It's the output of the last script we ran.output-diris where the concatenated images are stored.lightly-diris where the bounding boxes and metadata files are stored.
python set_up_transactions.py \
    --input-dir /datasets/DrivingStereo/data/ \
    --output-dir /datasets/DrivingStereo/transactions \
    --lightly-dir /datasets/DrivingStereo/.lightly
The resulting output directories should look like this:
/datasets/DrivingStereo/transactions
├── cloudy
...
└── sunny
    ...
    └── 2018-10-19-09-30-39_2018-10-19-09-31-02-413
└── vconcat.jpg/datasets/DrivingStereo/.lightly
├── metadata/
| ├── schema.json
| ├── cloudy
| ...
| └── sunny
| ...
| └── 2018-10-19-09-30-39_2018-10-19-09-31-02-413
| └── vconcat.json
├── predictions/
| ├── tasks.json
| └── transactions/
| ├── schema.json
| ├── cloudy
| ...
| └── sunny
| ...
| └── 2018-10-19-09-30-39_2018-10-19-09-31-02-413
| └── vconcat.json
├── cloudy
...
└── sunny
...
└── 2018-10-19-09-30-39_2018-10-19-09-31-02-413
└── vconcat.jpgThe next step is to move the data to our cloud bucket.
Set Up Your S3 Bucket
If you haven't done it already, follow the instructions here to set up an input and Lightly datasource on S3.
Upload the Data to the Bucket with the AWS CLI
We suggest you use AWS CLI to upload your dataset and predictions because it is faster for uploading large numbers of images. You can find the tutorial on installing the CLI on your system here. Test if AWS CLI was installed successfully with:
which aws
aws --version
After successful installation, you also need to configure the AWS CLI and enter your IAM credentials:
aws configureNow you can copy the content of your dataset to your cloud bucket with the aws s3 cp command. We'll copy the transactions directory to the input bucket and the .lightly directory to the output bucket:
aws s3 cp /datasets/DrivingStereo/transactions s3://bucket/input/DrivingStereo/transactions --recursive
aws s3 cp /datasets/DrivingStereo/.lightly s3://bucket/lightly/DrivingStereo/lightly --recursive
Replace the PlaceholderMake sure you don't forget to replace the placeholders
s3://bucket/inputands3://bucket/lightlywith the name of your AWS S3 bucket paths.
Now the dataset is ready to be used by the LightlyOne Worker!
Select Transactions with the LightlyOne Worker
Using LightlyOne to process datasets consists of three parts:
- Start the LightlyOne Worker.
- Create a new Dataset and configure a Datasource.
- Schedule a run.
We'll go through these steps in the next sections.
Start the LightlyOne Worker
Start the LightlyOne Worker. The worker will wait for new jobs to be processed. Note that the LightlyOne Worker doesn't have to run on the machine you're currently working on. You could, for example, use your cloud instance with a GPU or a local server to run the LightlyOne Worker while using your notebook to schedule the run.
docker run --shm-size="1024m" --gpus all --rm -it \
	  -e LIGHTLY_TOKEN={MY_LIGHTLY_TOKEN} \
	  lightly/worker:latest \
Use your Lightly Token and Worker IdDon't forget to replace the
{MY_LIGHTLY_TOKEN}placeholder with your own token. In case you forgot your token, you can find your token in the preferences menu of the LightlyOne Platform.
Create the Dataset and Datasource
We suggest putting the remaining four code snippets into a single Python script.
In the first part, we import the dependencies, and we create a new dataset.
from lightly.api import ApiWorkflowClient
from lightly.openapi_generated.swagger_client import DatasetType
from lightly.openapi_generated.swagger_client import DatasourcePurpose

# Create the LightlyOne client to connect to the API.
client = ApiWorkflowClient(token="MY_LIGHTLY_TOKEN")

# Create a new dataset on the LightlyOne Platform.
client.create_dataset(dataset_name="DrivingStereo", dataset_type=DatasetType.IMAGES)
dataset_id = client.dataset_id# Configure the Input datasource.
client.set_s3_delegated_access_config(
resource_path="s3://bucket/input/DrivingStereo/transactions/",
region="eu-central-1",
role_arn="S3-ROLE-ARN",
external_id="S3-EXTERNAL-ID",
purpose=DatasourcePurpose.INPUT,
)
# Configure the Lightly datasource.
client.set_s3_delegated_access_config(
resource_path="s3://bucket/lightly/DrivingStereo/lightly/",
region="eu-central-1",
role_arn="S3-ROLE-ARN",
external_id="S3-EXTERNAL-ID",
purpose=DatasourcePurpose.LIGHTLY,
)Schedule a Run
Finally, we can schedule a LightlyOne Worker run to select a subset of the data based on our criteria.
Here, it's important to set the task to transactions. This makes the LightlyOne Worker generate an embedding for each of the bounding boxes we generated earlier. Then the LightlyOne Worker selects 500 transactions such that the embeddings of the individual bounding boxes are as diverse as possible. It always selects whole transactions (both the left and right image) at once and compares each bounding box to all other bounding boxes.
scheduled_run_id = client.schedule_compute_worker_run(
        worker_config={
            "datasource": {"process_all": True},
        },
        selection_config={
            "n_samples": 500,
            "strategies": [
                {
                    "input": {"type": "EMBEDDINGS", "task": "transactions"},
                    "strategy": {"type": "DIVERSITY"},
                }
            ],
        },
    )
Once the run has been created, we can monitor it to get status updates. You can also head over to the user interface of the LightlyOne Platform to see the updates in your browser.
# You can use this code to track and print the state of the LightlyOne Worker.
# The loop will end once the run has finished, was canceled, or failed.
print(scheduled_run_id)
for run_info in client.compute_worker_run_info_generator(scheduled_run_id=scheduled_run_id):
    print(f"LightlyOne Worker run is now in state='{run_info.state}' with message='{run_info.message}'")

if run_info.ended_successfully():
    print("SUCCESS")
else:
    print("FAILURE")
Whenever you process a dataset with Lightly, you will have access to the following results:
- A completed LightlyOne Worker run with artifacts such as the logs and the PDF report that summarizes what data has been selected and why.
- The dataset in the LightlyOne Platform with the selected images.
- A second dataset in the LightlyOne Platform containing the selected bounding box images.
Access the Run Artifacts
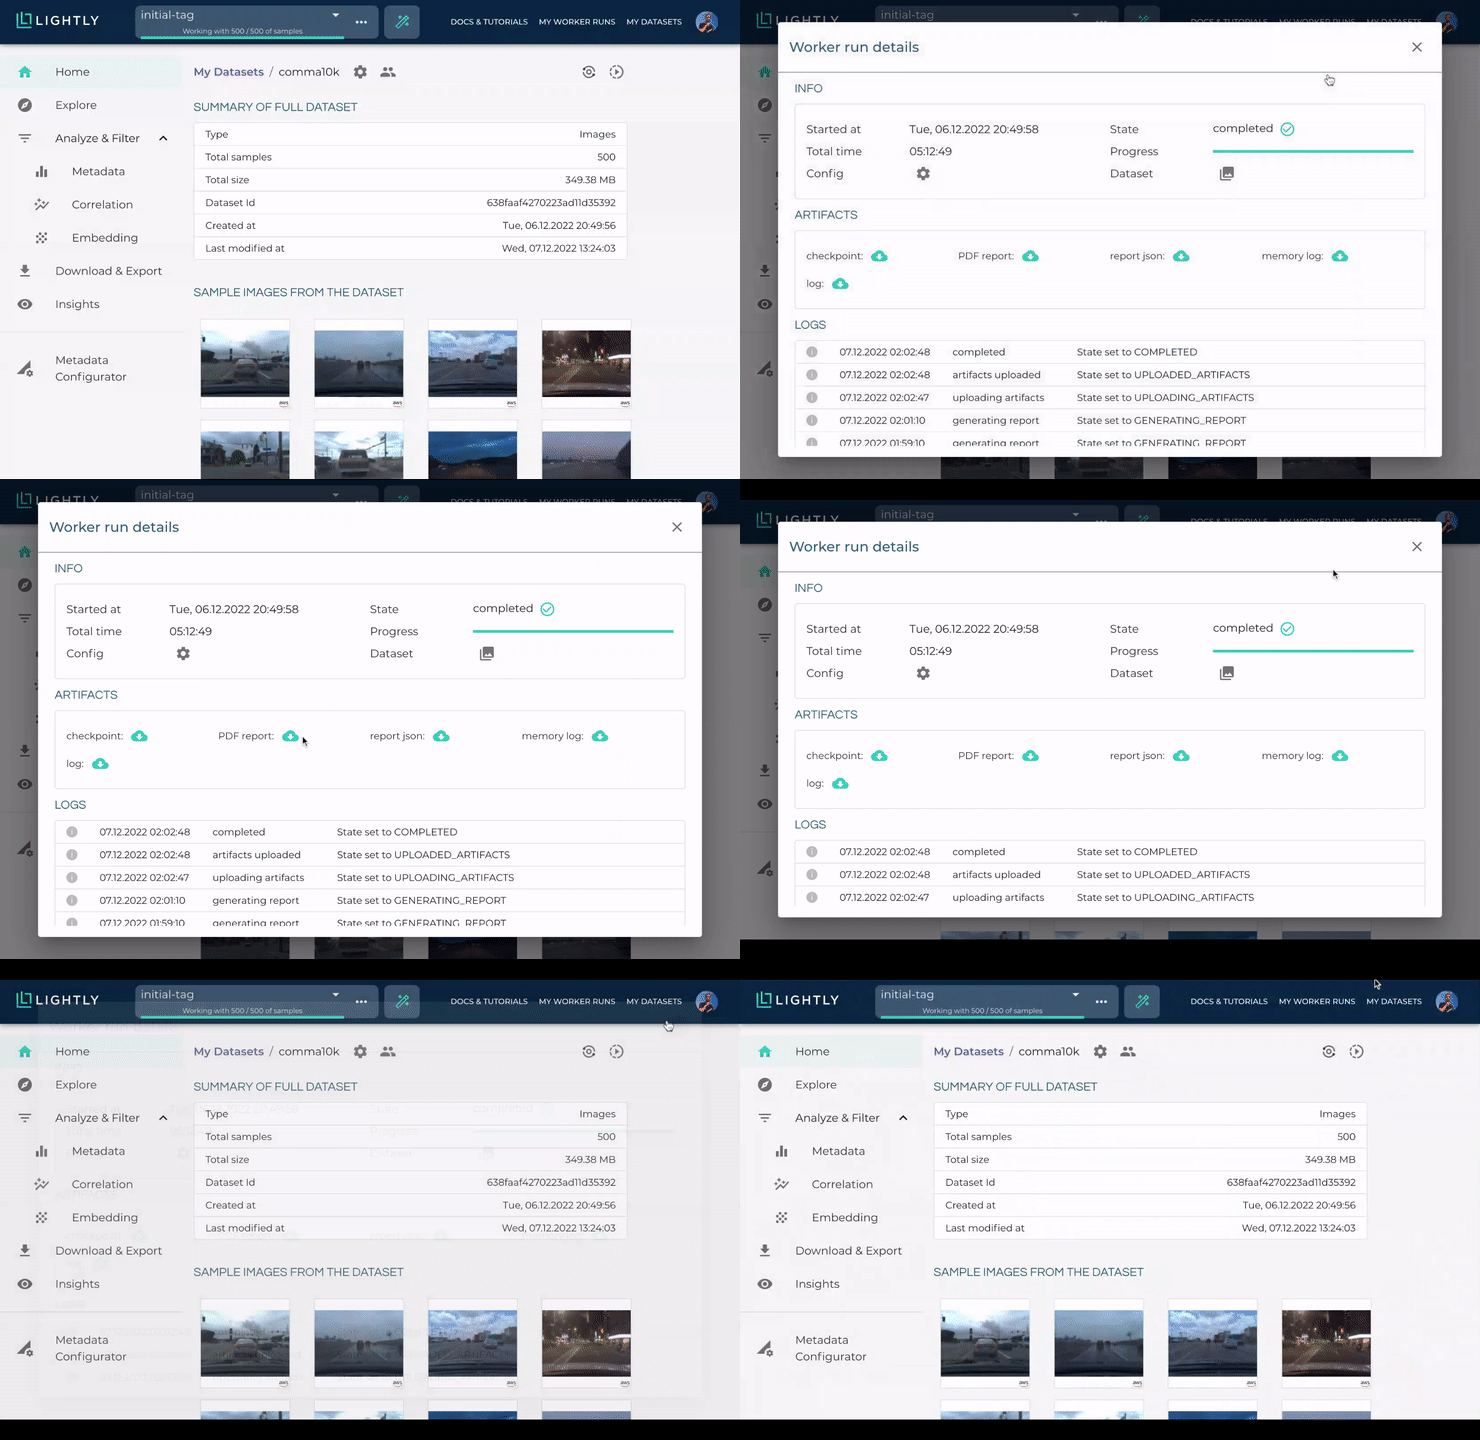
You can either access the run artifacts using the API or in the UI as shown below.

You can access the run artifacts either using Python code or through the user interface of the LightlyOne Platform.
Explore the Selected Data in the LightlyOne Platform
Using our interactive user interface, you can easily navigate through the selected data and get an overview before labeling the images.
Embeddings of the selected transactions colored by the metadata "weather" in the LightlyOne Platform.
Updated 7 months ago
