Install LightlyOne
Register at LightlyOne
If you haven't done this already, go to the LightlyOne Platform and sign up.
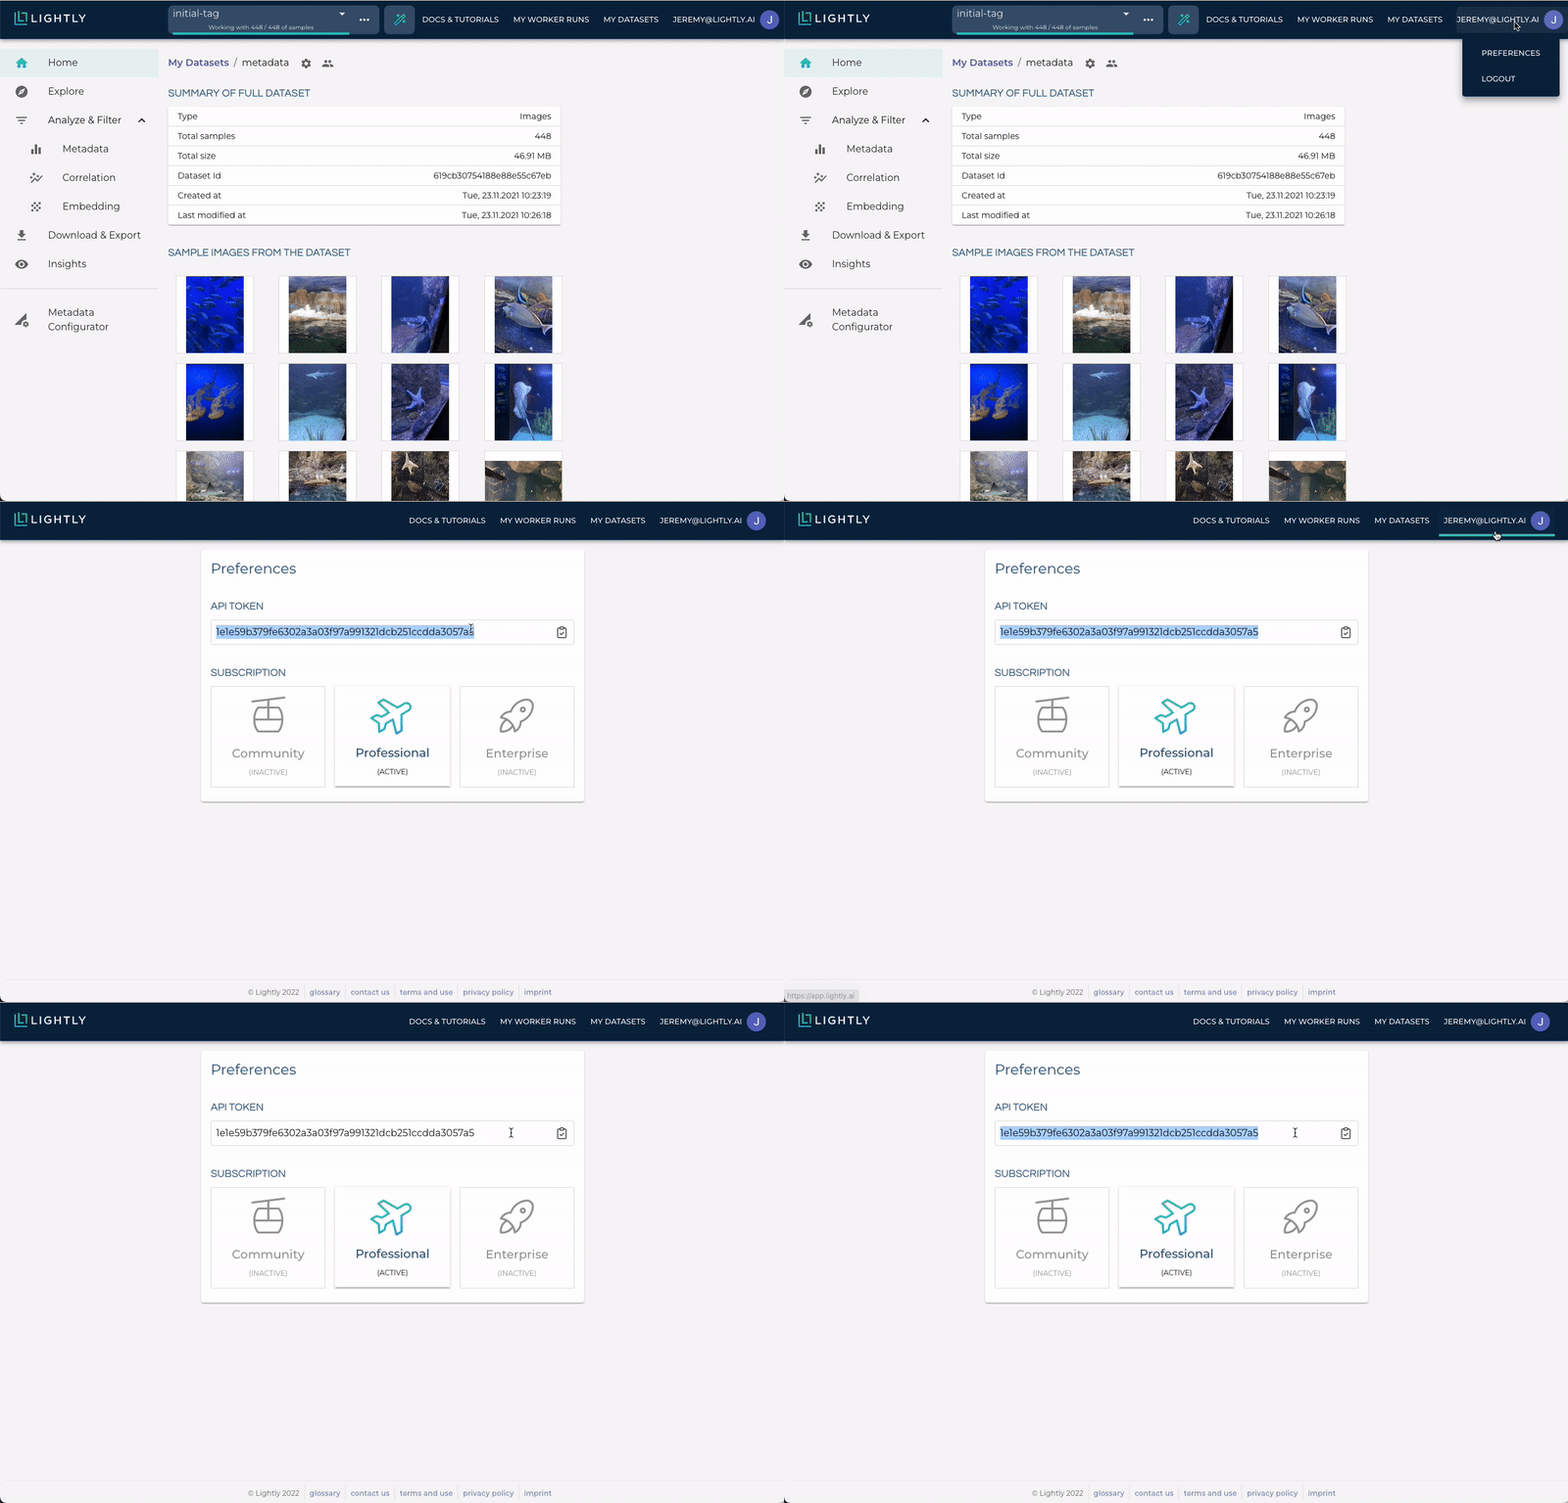
API Token
To authenticate the Python scripts and LightlyOne Worker, you need to provide them with your API token. You can retrieve it from the preferences page in the LightlyOne Platform.

Treat the API token like a passwordKeep the token to yourself, and don’t share it with others. Anyone possessing the API token can access your datasets and all other related secrets!
All-in-One Jupyter Notebook for Running LightlyOne
There is a self-contained, all-in-one jupyter notebook for setting up and running LightlyOne and also a quick start guide. This convenient notebook includes all necessary installations and instructions in a single, easy-to-follow format. It's an excellent alternative to navigating through the more extensive guides. Here's what it covers:
- Installing docker, the LightlyOne Worker, and the Lightly Python Client.
- Downloading a dataset.
- Scheduling a run on the dataset and processing it with the LightlyOne Worker.
Install the LightlyOne Worker
Use the following commands to pull the latest LightlyOne Worker image and check if it works:
docker pull lightly/worker:latest
docker run --shm-size="1024m" --rm -it lightly/worker:latest sanity_check=True
You should see an output similar to this one:
latest: Pulling from lightly/worker
... # The docker container is downloaded
Status: Downloaded newer image for lightly/worker:latest

[2024-04-10 15:11:36] Lightly Worker Solution v2.11.3
[2024-04-10 15:11:36] Congratulations! It looks like the Lightly container is running!
If this fails, see our in-depth installation guide.
Mac with Apple SiliconIf you use a Mac with an Apple silicon chip, make sure to enable Rosetta emulation in Docker Desktop for fast processing. To enable it go to
Docker Desktop > Settings > General > Use Rosetta for x86_64/amd64 emulation on Apple Silicon. This requires Docker Desktop 4.25 or later.
Install the Lightly Python Client
You will use the Lightly Python Client to interact with the LightlyOne Platform. It offers helper functions to create and delete datasets, schedule runs, and access the results. In contrast to the LightlyOne Worker, the Lightly Python Client doesn't require a lot of compute. Run the following commands on any machine from which you want to schedule data processing jobs.
Note that the Lightly Python Client supports Python versions from 3.6 to 3.11. Python 3.12 is not yet supported as PyTorch has no official support for it yet.
pip3 install lightlyFor updating, use the usual pip command:
pip3 install --upgrade lightly
Install Lightly Python Client without PyTorchTo save disk space, it is possible to manually install only those lightly package dependencies which are required for the API client functionality. In particular, this will bypass installation of PyTorch and Torchvision:
pip install -r https://raw.githubusercontent.com/lightly-ai/lightly/master/requirements/base.txt
pip install lightly --no-deps
Start the LightlyOne Worker
Finally, on the machine where the LightlyOne Worker is installed, start it in waiting mode. In this mode, the worker will long-poll the LightlyOne API for new runs to process. (On CPU-only machines, remove the --gpus all config option.)
Cloud Storage
If you use cloud storage as datasource, start the worker as follows:
docker run --shm-size="1024m" --gpus all --rm -it \
	-e LIGHTLY_TOKEN="MY_LIGHTLY_TOKEN" \
	lightly/worker:latest
Local storage
If you want to use local storage as datasource, you need to mount two directories to the LightlyOne Worker:
docker run --shm-size="1024m" --gpus all --rm -it \
	-v "MY_PATH_TO_INPUT_DIRECTORY":/input_mount:ro \
	-v "MY_PATH_TO_LIGHTLY_DIRECTORY":/lightly_mount \
	-e LIGHTLY_TOKEN="MY_LIGHTLY_TOKEN" \
	lightly/worker:latest
The two directories mounted via the -v flag are:
input_mount This is the local directory mounted to the LightlyOne Worker. It is MY_PATH_TO_INPUT_DIRECTORY in the example. It contains the input images or videos for processing.
lightly_mount This is the working directory for the LightlyOne Worker. It is MY_PATH_TO_LIGHTLY_DIRECTORY in the example.
To learn more, read up on datasources for local storage.
Expected output
With your worker running, you should see an output similar to this one:
[2024-05-16 12:40:49] Lightly Worker Solution v2.12.0
[2024-05-16 12:40:50] You are using docker build: Mon May 13 14:30:25 UTC 2024.
[2024-05-16 12:40:50] Starting worker with id '6645fea6b30bddb07845f6b6'...
[2024-05-16 12:40:50] Worker 2.12.0 can only process jobs scheduled with Lightly Python client 1.5 or higher.
[2024-05-16 12:40:50] Worker with labels '[]' started. Waiting for jobs...
Great! Well done!The next step is to configure a dataset and schedule a job the LightlyOne Worker can pick up.
Advanced Topics
Running Parallel LightlyOne WorkersIf you plan to use multiple workers for sequential or concurrent execution, register them separately and use a unique name and specific labels for them.
Loading Environment Variables from a FileWhen passing environment variables directly to a docker container using
-ethey could be exposed to other users that have access to the same machine. Instead you can pass a file with the variables using--env-file. See the official docker docs for more information.
Updated 11 months ago
