AWS S3
LightlyOne allows you to configure a remote datasource like Amazon S3 (Amazon Simple Storage Service). This guide will show you how to set up your S3 bucket and configure your dataset to use the said bucket.
List, Read, Write and Delete Permissions
LightlyOne needs to have read, list, write and delete permissions (s3:GetObject, s3:ListBucket, s3:PutObject and s3:DeleteObject) on your bucket.
More Fine-Grained PermissionsYou can also split up the permissions for the input bucket (where your data is) and the LightlyOne bucket (where the predictions, metadata and generated files such as thumbnails are).
The input bucket only requires
s3:GetObjectands3:ListBucketpermission (aka only read access). You can even add more restrictions using IP blocking that would ensure no data can leave a defined IP range.
User Access and Delegated Access
There are two ways to set up the aforementioned permissions:
Delegated Access (recommended)
To access your data in your S3 bucket on AWS, LightlyOne can assume a role in your account, which has the necessary permissions to access your data. Use this method if internal or external policies of your organization require it or disallow the user access method. See Delegated Access on how to set up access via delegated access.
If security and compliance are important (e.g. SOC2) you want to pick this option.
Implications of Delegated AccessWe recommend using delegated access, especially if security and compliance are important. However, due to limited access time, the LightlyOne API needs to check and refresh read- and write-urls upon every request. This can make delegated access 2 or 3 times slower than user access.
User Access
This method will create a user with permissions to access your bucket. An Access key ID and Secret access key allow you to authenticate as this user. See User Access on how to set up access via user access. Setting up user access is more beginner friendly.
Setup Access Policies
Delegated Access
- Go to the AWS IAM Console.
- Click "Create role".
- Select "AWS Account" as the trusted entity type
- Select "Another AWS" account and specify the AWS Account ID of Lightly:
916419735646 - Do not check "Require MFA"
- Check "Require external ID", and set the external ID. The external ID is obtained from your preferences page. Only you are able to use this external ID for setting up delegated access, and it should be treated like a passphrase.
If you are part of a team or are using the service account token, you should use the external ID of your team. When removing a member from your team, all datasets of the member that used the external ID of your team will be invalidated. - Click next
- Select "Another AWS" account and specify the AWS Account ID of Lightly:
- Select a policy that grants access to your S3 bucket. If no policy has previously been created, here is an example of how the policy should look like. Please substitute
YOUR_BUCKETwith the name of your bucket.
{
    "Version": "2012-10-17",
    "Statement": [
        {
            "Sid": "lightlyS3Access",
            "Action": [
                "s3:GetObject",
                "s3:DeleteObject",
                "s3:PutObject",
                "s3:ListBucket"
            ],
            "Effect": "Allow",
            "Resource": [
                "arn:aws:s3:::{YOUR_BUCKET}/*",
                "arn:aws:s3:::{YOUR_BUCKET}"
            ]
        }
    ]
}- Name the role
Lightly-S3-Integrationand create the role. - Remember the external ID and the ARN of the newly created role (
arn:aws:iam::123456789012:role/Lightly-S3-Integration)
User based Access
- Go to the Identity and Access Management IAM page and create a new user for Lightly.
- Choose a unique name and select “Programmatic access” as “Access type”.
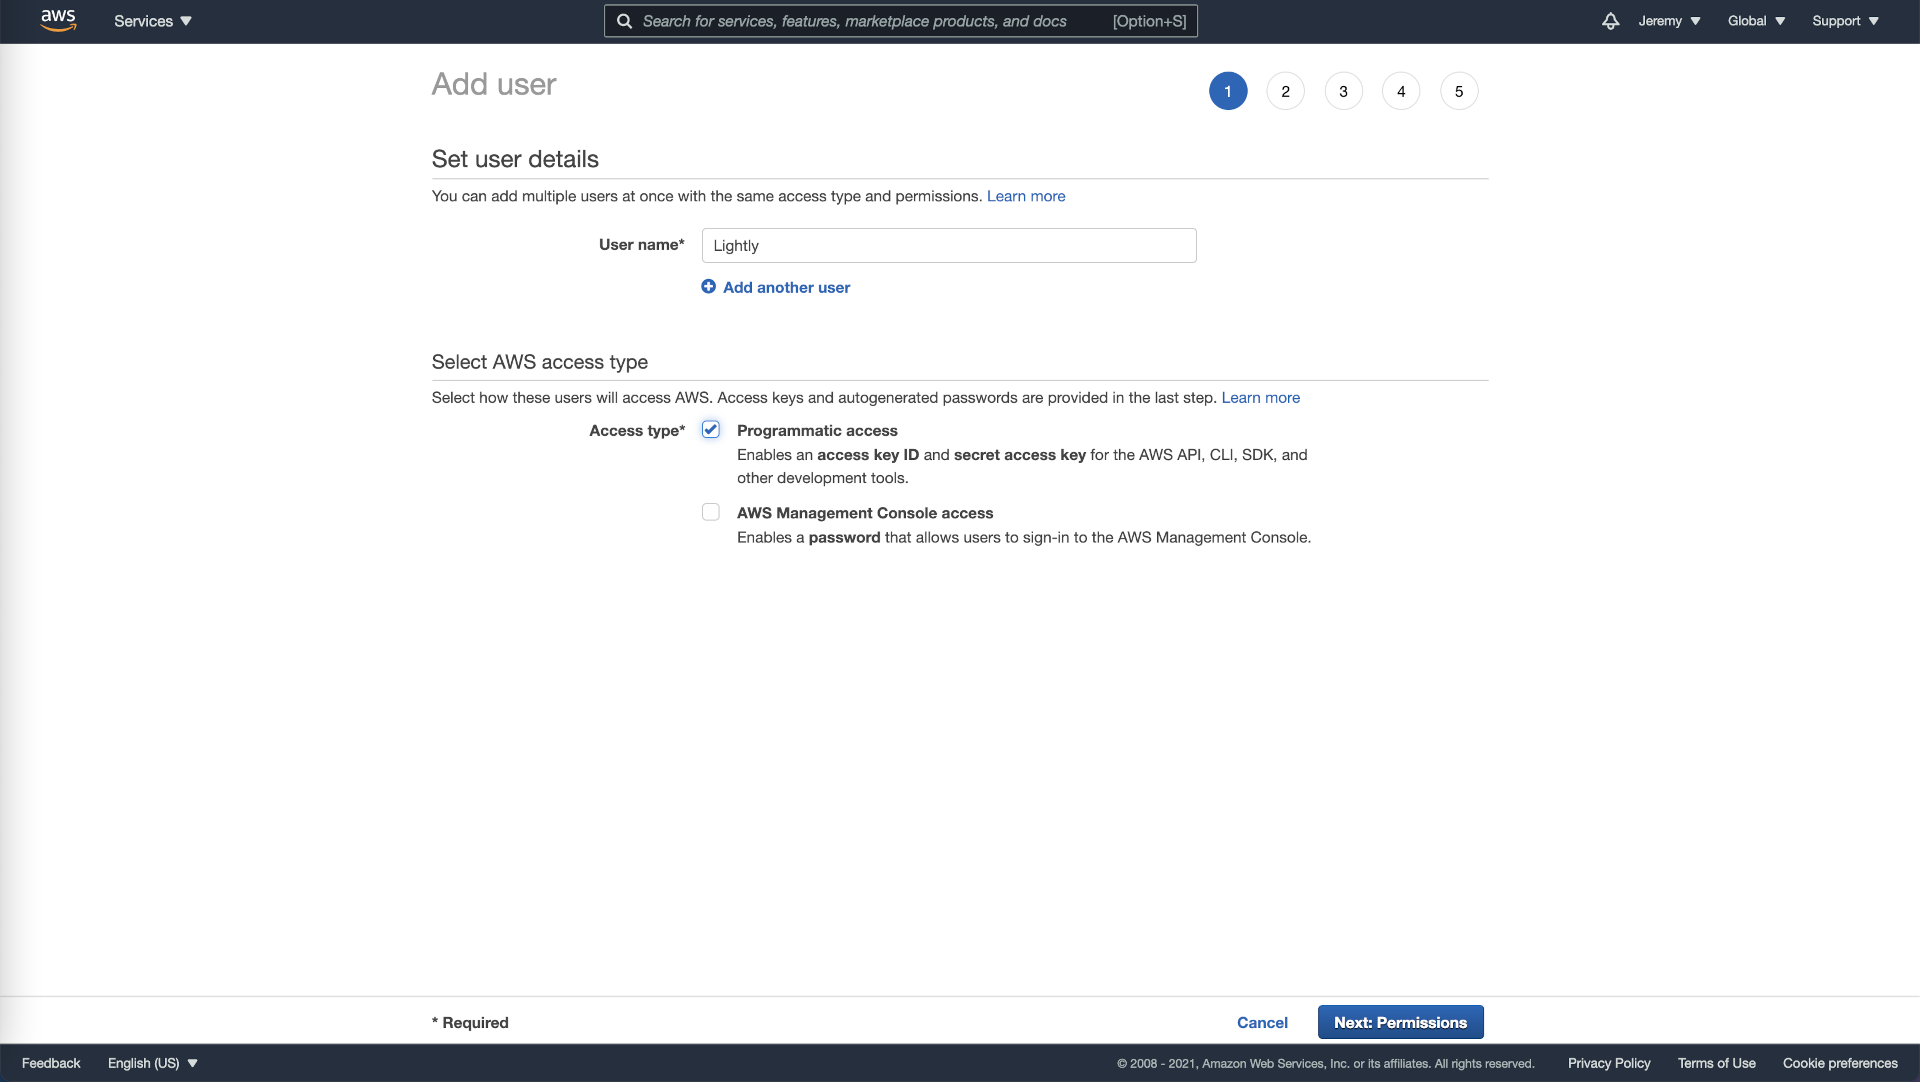
Create AWS User.
- We will want to create very restrictive permissions for this new user so that it can’t access other resources of your company. Click on “Attach existing policies directly” and then on “Create policy”. This will bring you to a new page.
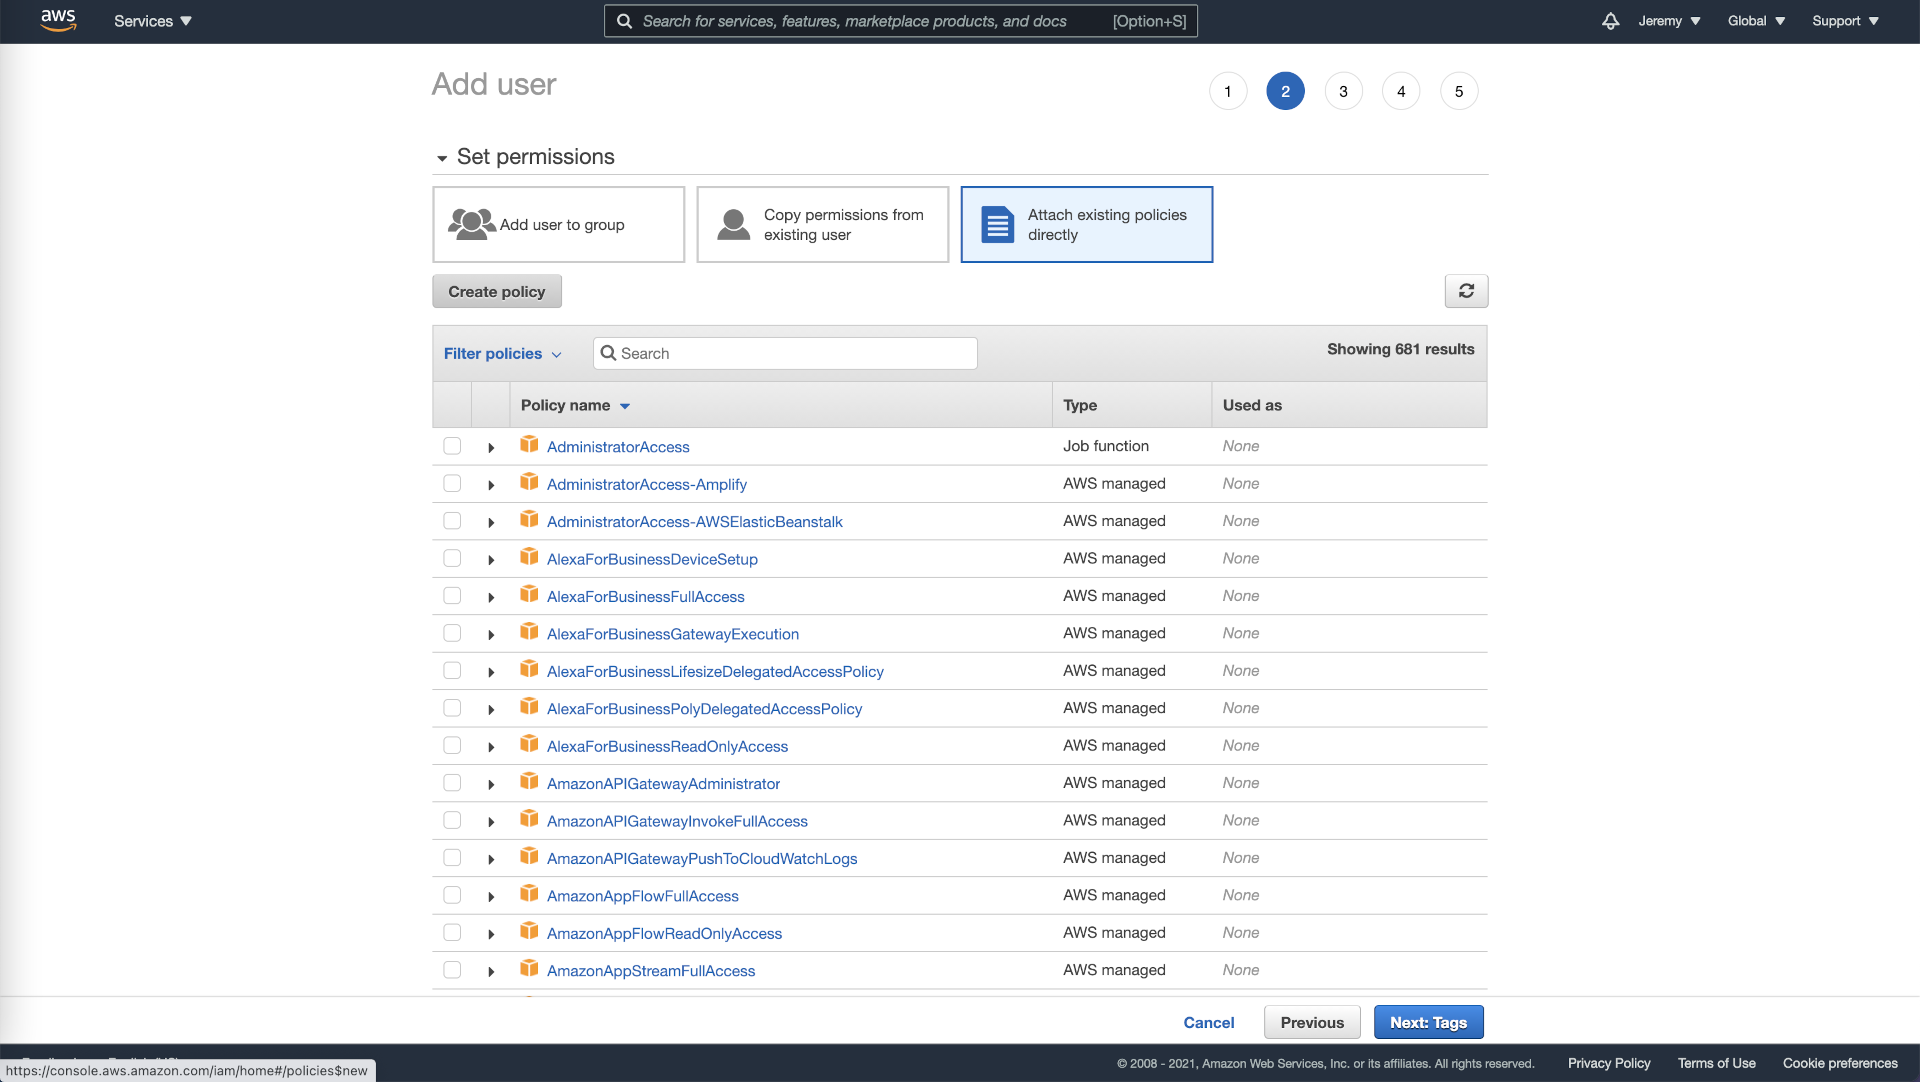
Setting user permission in AWS.
- As our policy is straightforward, we will use the JSON option and enter the following. Please substitute datalake with the name of your bucket and projects/farm-animals/ with the folder you want to share.
{
    "Version": "2012-10-17",
    "Statement": [
        {
            "Sid": "AllowListing",
            "Effect": "Allow",
            "Action": "s3:ListBucket",
            "Resource": [
                "arn:aws:s3:::datalake",
                "arn:aws:s3:::datalake/projects/farm-animals/*"
            ]
        },
        {
            "Sid": "AllowAccess",
            "Effect": "Allow",
            "Action": "s3:*",
            "Resource": [
                "arn:aws:s3:::datalake/projects/farm-animals/*"
            ]
        }
    ]
}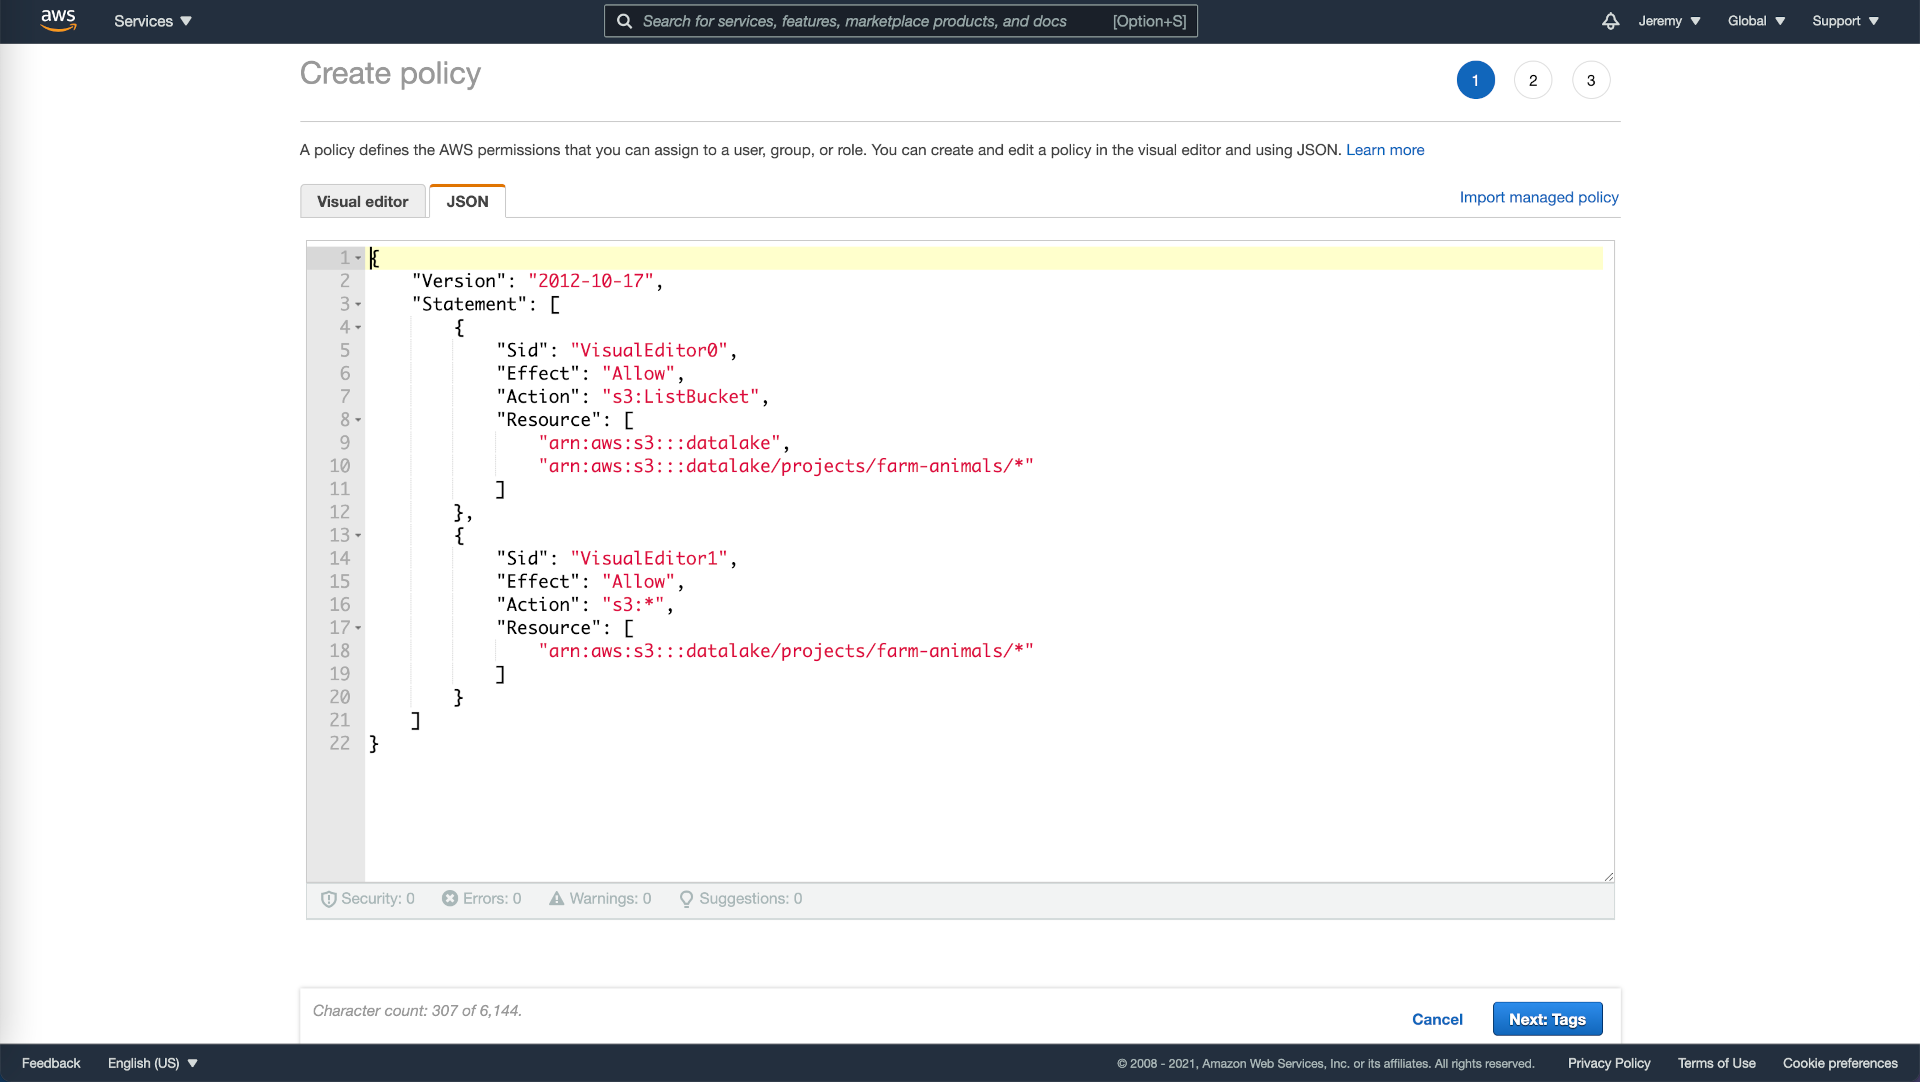
Permission policy in AWS.
- Go to the next page and create tags as you see fit (e.g., external or lightly) and give a name to your new policy before creating it.
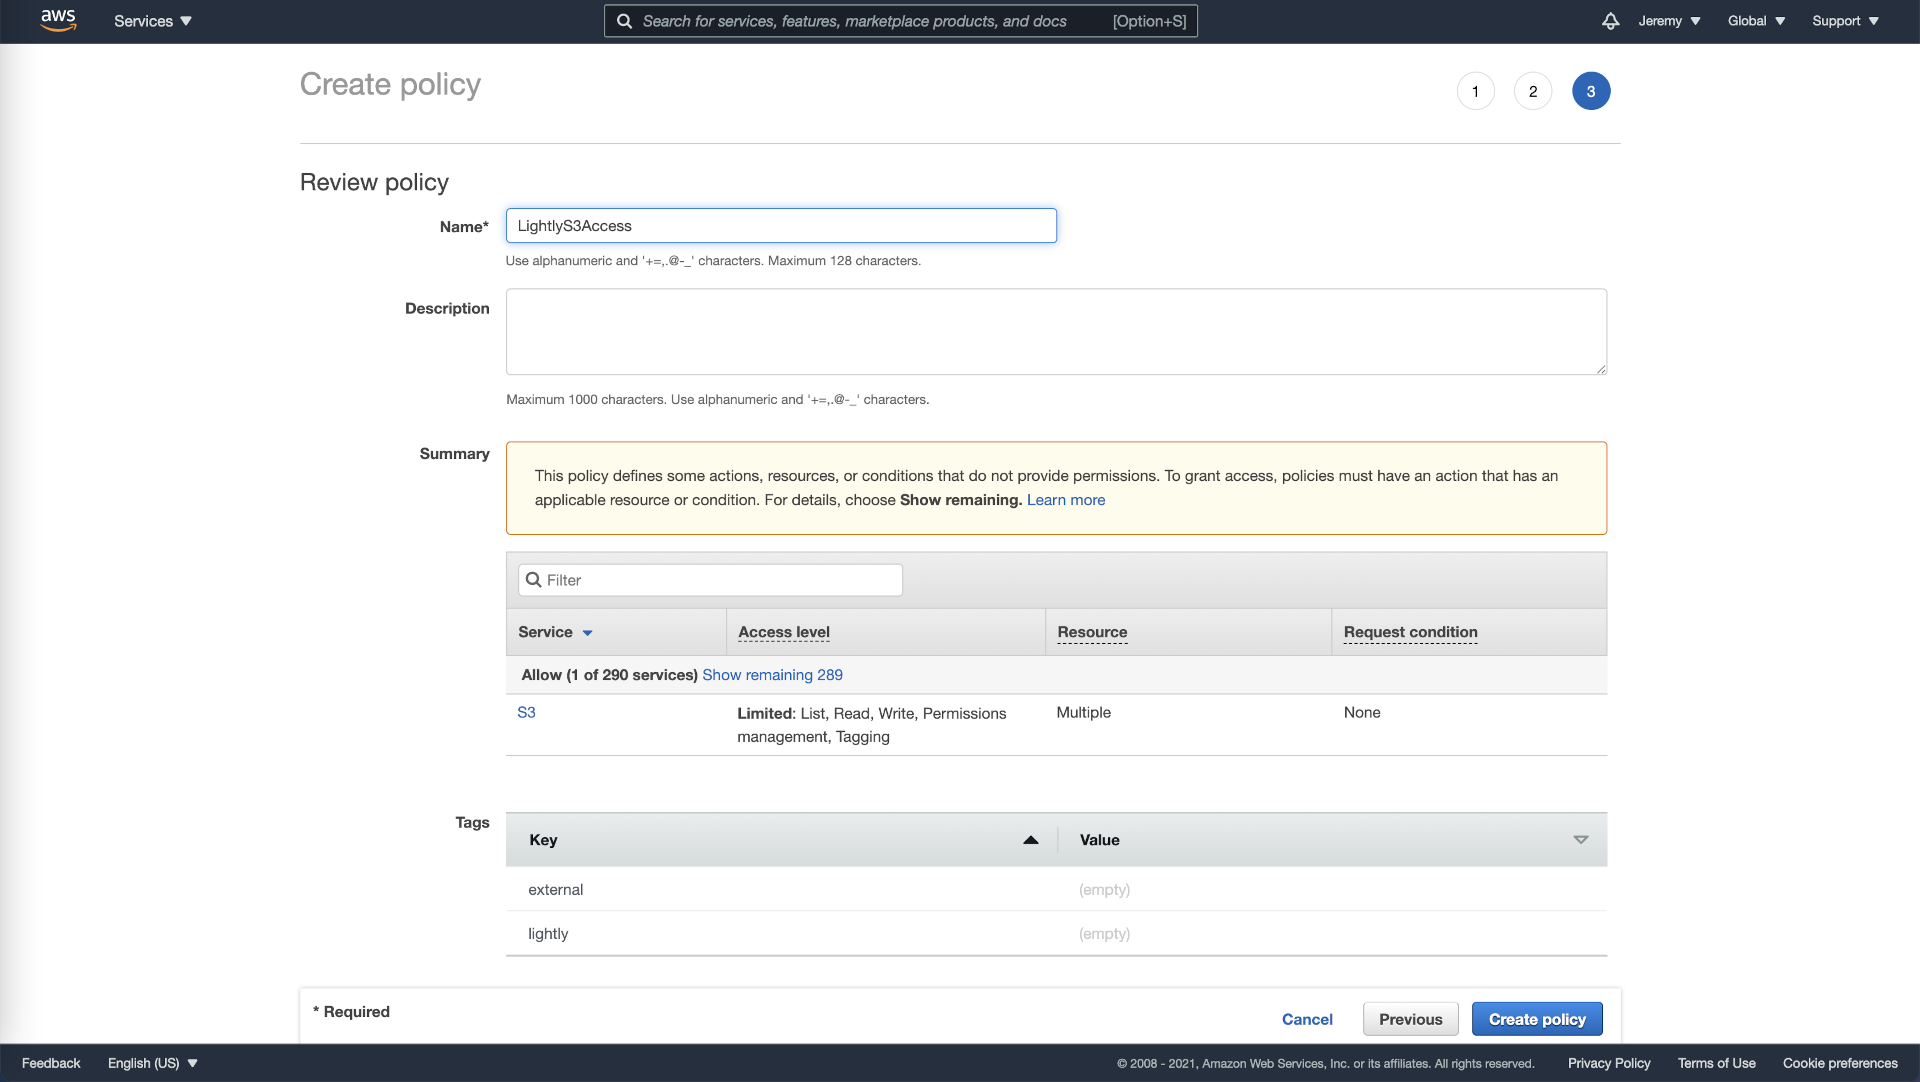
Review and name permission policy in AWS.
- Return to the previous page, as shown in the screenshot below, and reload. Now when filtering policies, your newly created policy will show up. Select it and continue setting up your new user.
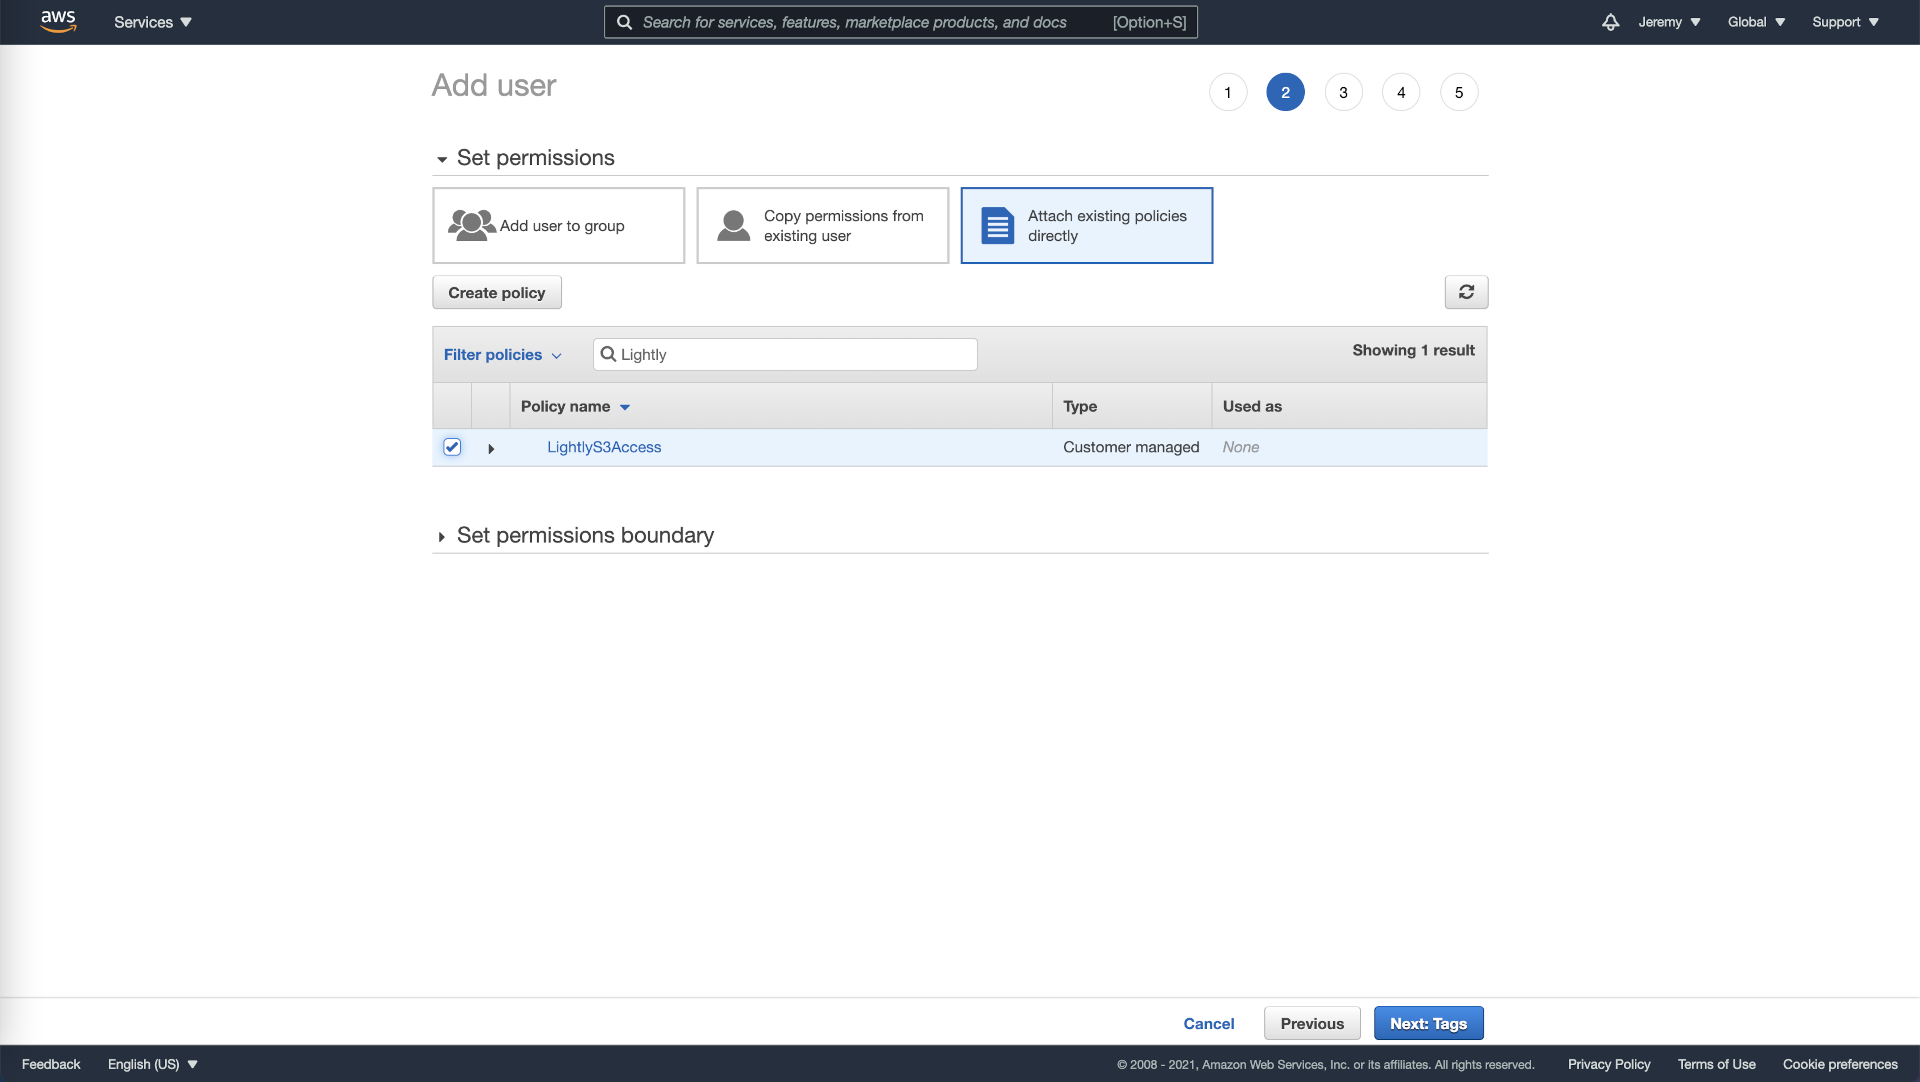
Attach permission policy to user in AWS.
- Write down the Access key ID and the Secret access key in a secure location (such as a password manager), as you will not be able to reaccess this information (you can generate new keys and revoke old keys under Security credentials of a users detail page).
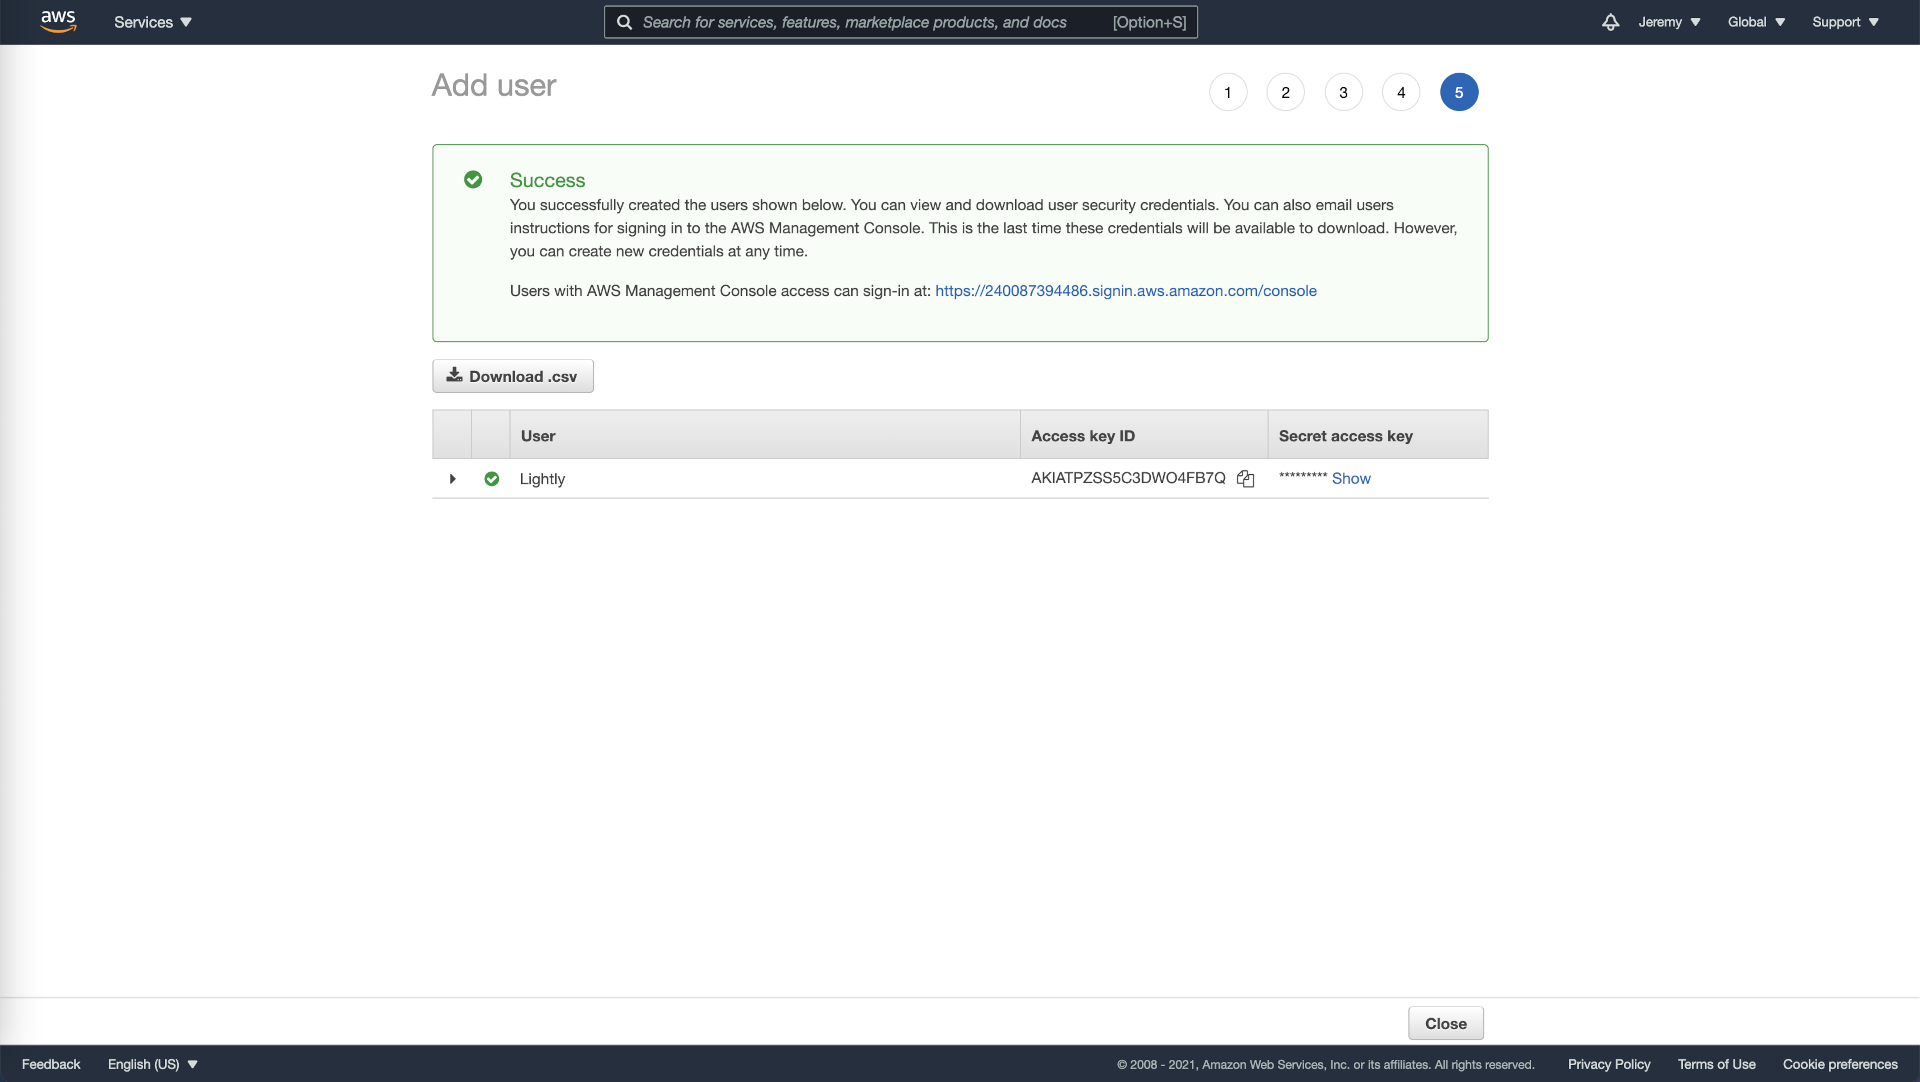
Get security credentials (access key id, secret access key) from AWS.
Configure a Datasource
That's it! Head over to Datasources to see how you can configure LightlyOne to access your data while following the notes below:
NoteIf you want to use server side encryption, toggle the switch "Use server-side encryption" and set the
KMS key arn. (see: S3 Server Side Encryption with KMS)
Advanced Use Cases
Server-Side Encryption with KMS
It's possible to enable server-side encryption with a KMS key as outlined by the official documentation of AWS.
Create the KMS Key
- Go to the Key Management Service KMS page and create a new KMS key for the bucket.
- Choose a unique name of your choice and select "Symmetric" and "Encrypt and decrypt". Click next.
- On the
define key usage permissionsstep 4, ensure that the IAM user or role configured to be used with the datasource in the LightlyOne Worker is selected. Click next and create the key. - After creation, you can click on the key and copy the
KMS key arn.
NoteThe IAM user or role which is configured to be used with the datasource in the LightlyOne Worker will additionally need the following AWS KMS permissions: kms:Encrypt, kms:Decrypt and kms:GenerateDataKey.
Using the KMS Key
When setting up an S3 datasource in Lightly, you can set the KMS key arn. In that case, the LIGHTLY_S3_SSE_KMS_KEY environment variable will be set, which will add the following headers x-amz-server-side-encryption and x-amz-server-side-encryption-aws-kms-key-id to all requests (PutObject) of the artifacts LightlyOne creates (like crops, frames, thumbnails) as outlined by the official documentation of AWS.
More Restrictive Policies
It is possible to make your access policy very restrictive and even to deny anyone with the correct IAM user credentials or role from outside, e.g., your VPC or a specific IP range, from reading your data.
The only hard requirement LightlyOne requires to work correctly is S3:ListBucket. With this permission, LightlyOne will only be able to list the filenames within your bucket but can’t access the contents of your data. Only you will be able to access your data’s content.
WarningThe LightlyOne Worker will need to be running within the permissioned zone that allows
S3:GetObject(e.g., within your VPC or IP range) and will need the configuration flagdatasource.bypass_verifyset toTruein the worker configuration.Important: When restricting
S3:GetObject, it will no longer be possible to use the relevant filenames feature.
NoteIf you later want to use the LightlyOne Platform to visualize your data (e.g., see the images in the embedding view), you will also need to whitelist the IPs from where you are planning to access it (e.g., the IP of your ISP at your office or the IP of your VPN).
Restrict IP-Range
The following example restricts access to your bucket datalake so that only services from the IP range 21.21.21.x are allowed to access your data (see “Sid”: “RestrictIP”). For LightlyOne to work correctly, we allow s3:ListBucket (see “Sid”: “AllowLightly”).
{
    "Version": "2012-10-17",
    "Statement": [
        {
            "Sid": "RestrictIP",
            "Action": "s3:*",
            "Effect": "Allow",
            "Resource": [
                "arn:aws:s3:::datalake",
                "arn:aws:s3:::datalake/projects/farm-animals/*"
            ],
            "Condition": {
                "IpAddress": {
                    "aws:SourceIp": [
                        "21.21.21.0/24"
                    ]
                }
            }
        },
        {
            "Sid": "AllowLightly",
            "Effect": "Allow",
            "Action": "s3:ListBucket",
            "Resource": [
                "arn:aws:s3:::datalake",
                "arn:aws:s3:::datalake/projects/farm-animals/*"
            ]
        }
    ]
}
Restrict VPC
It is possible to restrict access to a specific VPC by specifying a string condition.
{
    "Version": "2012-10-17",
    "Statement": [
        {
            "Sid": "RestrictVPC",
            "Action": "s3:*",
            "Effect": "Allow",
            "Resource": [
                "arn:aws:s3:::datalake",
                "arn:aws:s3:::datalake/projects/farm-animals/*"
            ],
            "Condition": {
                "StringEquals": {
                    "aws:SourceVpc": "vpc-111bbb22"
                }
            }
        },
        {
            "Sid": "AllowLightly",
            "Effect": "Allow",
            "Action": "s3:ListBucket",
            "Resource": [
                "arn:aws:s3:::datalake",
                "arn:aws:s3:::datalake/projects/farm-animals/*"
            ]
        }
    ]
}
Further Restrictions
There are different ways of expressing the logic of restricting access to your resources. You can DENY access to specific permissions or invert the permission with NotAction. There are also further conditional operators and string conditions to be more explicit.
For more restrictive specification of Resources ARN patterns in the Lightly bucket, see the paths of artifacts created there by LightlyOne Worker runs in the cloud storage - lightly path structure document.
AWS S3 Compatible Storage
There are many cloud providers which are compatible with AWS S3 via their Object Storage Service (OBS or OSS).
Examples are
- open telekom cloud
- alibaba cloud
- huawei cloud
- and more
Using Object Storage Service (OBS)
Using the object storage service of your cloud provider with LightlyOne has the same requirements as outlined at the beginning of this document. The easiest way to connect LightlyOne with the storage of your cloud provider is to setup user access and create a policy with permissions. How to do this exactly will deviate from AWS, but will be very similarly achievable in the identity and access management (IAM) dashboards of your respective cloud provider.
Please remember to change the prefixes used in the policy examples from s3 with obs (or whichever prefix your cloud provider might have defined in their documentation).
After you have setup a user and a policy, continue with configuring a datasource.
Updated 10 months ago
